Showing posts with label Perforated pan. Show all posts

Monday, October 8, 2012

How to make a perfect Donatos clone

Become a fan of this blog on Facebook!
The most useful pizzamaking lesson you'll ever learn.

The picture below is from my very first attempt at cloning Donatos. If you are familiar with Donatos, then you know this pizza looks just like a Donatos pepperoni pizza. (And yes, it did taste like Donatos.) If I can do it in one try, relying on incomplete information to guide me, then you can surely do it by following my detailed instructions.

Immediately after baking.

Nice golden color on this undercrust shot.

Having worked at Donatos for about a year and a half, I know a lot about how Donatos operates. However, even though I worked there for that long, it was impossible for me to learn anything about how they make their dough because Donatos makes their dough off-site, in a commissary, before a distributor delivers it to the stores in boxes of pre-sheeted frozen discs.

When I decided to attempt to clone Donatos, I started by gathering information shared by people who had already tried cloning Donatos. The formula here seemed like a pretty decent place to start. However, having handled thousands of actual Donatos dough skins, I could tell just by looking at the formula that the hydration percentage was way too high, as Donatos dough is pretty stiff (and because 54% hydration does not make a stiff dough, especially if the dough also contains a lot of oil and eggs, as this dough does). So I changed the 54% hydration figure to 35%, in addition to making a few other minor changes. I omitted dried dairy whey and nonfat dry milk because I didn't have any available. (Even though the pizza turned out fine without these ingredients, if I'd had them, I would have used them.)

So here's the formula I used:

100% All Trumps high gluten flour
35% Water
10.8% Egg
0.5% ADY
1.3% Salt
3.8% Canola Oil
0.93% Sugar

I only listed All Trumps flour because that's what I used when I attempted to clone Donatos. If I ever attempt to make this kind of pizza again, I'll almost certainly try a bleached all-purpose flour. So go ahead and use all-purpose flour.

Here's a recipe that will make 30 oz of dough, which is enough for two 14" pizzas:

19.67 oz Flour
6.88 oz Water
2.12 oz Egg (I think this was one whole egg.)
1 tsp ADY
1.94 tsp Salt
0.69 oz Oil
1.61 tsp Sugar

Special equipment you'll need for this pizza:
  • A kitchen scale that measures in ounces.
  • A 14" perforated aluminum coupe-style pan, seasoned.
  • Dough docker (but a fork will suffice).
  • Pizza wheel.
  • Baking stone (optional but recommended).

And here's the instructions for how to make this pizza:
  1. Measure the appropriate quantity of yeast (1 tsp) and put it in your mixer bowl.
  2. Measure the appropriate quantity of 110-degree water (6.88 oz) and pour about 2 oz of it into the mixer bowl.
  3. Add a pinch of sugar to the yeast water.
  4. Stir the yeast water to make sure there are no clusters (or clumps) of yeast.
  5. Measure the appropriate quantity of flour (19.67 oz) and set aside.
  6. Measure the appropriate quantity of salt (1.94 tsp) and add it to the flour.
  7. Measure the appropriate quantity of sugar (1.61 tsp) and add it to the flour.
  8. Use a wire whip or spoon to incorporate salt and sugar into the flour.
  9. Measure the appropriate amount of egg (2.12 oz, or 1 egg) and set aside.
  10. Measure the appropriate amount of oil (0.69 oz) and set aside.
  11. Check the yeast water. If it is foamy, it means the yeast is alive and hydrated, so move on to the next step. If the yeast water is not foamy, wait 5 minutes and check again. After you check the yeast again, go ahead and move on to the next step, even if the yeast water is not foamy. (The yeast is probably fine, but be aware that if the yeast water has not become foamy, it may mean your yeast is dead. So if your pizza ends up showing no sign of fermentation, buy some new yeast and try again.)
  12. Add the rest of the water to the mixer bowl.
  13. Add the rest of the ingredients to the mixer bowl.
  14. Place the mixer bowl in its place on the mixer and attach the dough hook.
  15. Mix the dough for about 5 minutes, or until all the ingredients are distributed evenly throughout the dough.
  16. Divide the dough into two pieces, with one of the dough pieces weighing about 16 oz.
  17. Give each piece of dough a few kneeds and round them into dough balls.
  18. Let the dough balls rest at room temperature for two hours, covered or in a bag.

After the dough balls have rested at room temperature for a couple hours, begin turning the dough into skins, following these steps:
  1. Set the smaller dough ball aside.
  2. Use your hands to flatten the larger dough ball, in preparation for for rolling the dough.
  3. Roll the piece of dough with a rolling pin until the dough is slightly larger than 14". Try not to use much flour while rolling the dough, and try to keep the dough as circular as possible.
  4. When the dough is just larger than 14", place your 14" pan atop the dough.
  5. Using a pizza wheel (pizza cutter), trim the dough around the circumference of the pan.
  6. Remove the excess dough and weigh the dough skin. At this point, the weight of the dough skin should be around 14.62 oz. But if it's still heavier than that, continue rolling and trimming until the dough skin weighs about 14.62 oz.
  7. When you've trimmed the dough skin down to about 14.62 oz, sprinkle a little cornmeal on your work surface and place the dough skin atop the cornmeal. Also, place the dough scraps under the second dough ball (because you'll need this dough to make the second dough ball weigh enough to make another 14" skin.)
  8. Roll the dough skin lightly, until it is slightly larger than the 14" pan (because the skin will shrink back down to about 14").
  9. Once you feel confident that the skin will not shrink to smaller than 14", dock the dough with either a docker or a fork.
  10. If you will only be making one pizza today, find a way to cover both the top and bottom of the skin with plastic wrap. (Since you won't be using this skin for at least a day, you want to make sure the skin does not dry out in the refrigerator.)
  11. Put this skin in the refrigerator. Keep it flat, if possible.
  12. Repeat Steps 2-9 with the second dough ball.
  13. Spray your perforated pan with nonstick spray (optional). Here are a couple pics of how your seasoned pan should look:


  14. Showing the top of a seasoned 14" perforated aluminum pan. This American Metalcraft pan
    is very similar to the pans they use at Donatos.

    Showing the bottom of a seasoned 14" pan.

  15. Place the skin atop the pan, with the cornmeal side of the dough as the bottom of the skin.


  16. Trimmed skin on a pan. The skin shrank at least half an inch after I trimmed it.
    If you follow my instructions, this should not happen to you.

  17. Spray the top of the dough skin with nonstick spray.
  18. Leave the skin at room temperature for at least a couple hours before assembling a pizza.

At least half an hour before you intend to begin assembling the pizza, set your oven to 500 degrees and preheat. When the oven has preheated for at least half an hour, begin assembling your pizza.

  1. Add 8 oz of sauce to the top of the dough skin.


  2. After adding 8 oz of sauce to the dough skin.

  3. Pick up the pan and tilt it so the sauce flows to the edge of the skin.


  4. Donatos uses gravity to distribute their sauce on the dough skin.

  5. As the sauce reaches the edge of the skin, turn the pan almost like a steering wheel and let the sauce flow along the edge of the skin until the sauce covers the entire skin, from edge to edge.


  6. Using gravity.

    Using gravity.

    Done using gravity.

  7. Add 7.68 oz of provolone (or mozzarella) to the sauced skin, from edge to edge. If you are making a cheese pizza, add a little more cheese (because when you order a cheese pizza at Donatos, you're actually ordering an extra cheese pizza, which is why a cheese pizza costs the same as a 1-topping pizza). I don't know exactly how much is the right amount of cheese for extra cheese. Probably another 2 oz or so.


  8. 7.68 oz (0.480 lbs) of provolone cheese.

  9. If you're making a pepperoni pizza, add 4.8 oz of pepperoni (or 0.300 lbs). If you plan to use more toppings than just pepperoni, use 3.52 oz of pepperoni (or 0.220 lbs). (The topping weights I've listed here are the exact weights they use at Donatos. If I did not list a weight, it's because I don't know what the weight should be. Even though I listed a weight for the dough skin, I don't know the exact weight of a 14" Donatos dough skin. However, I do know the weight I listed is very close.)


  10. 4.8 oz (0.300 lbs) of pepperoni. I used very thinly-sliced Bridgford pepperoni stick.

  11. Just before you put the pizza in the oven, shake a mixture of romano cheese and oregano over the top of the pizza. My memory tells me this mix should be about 80% romano and 20% oregano. Or maybe 75/25.


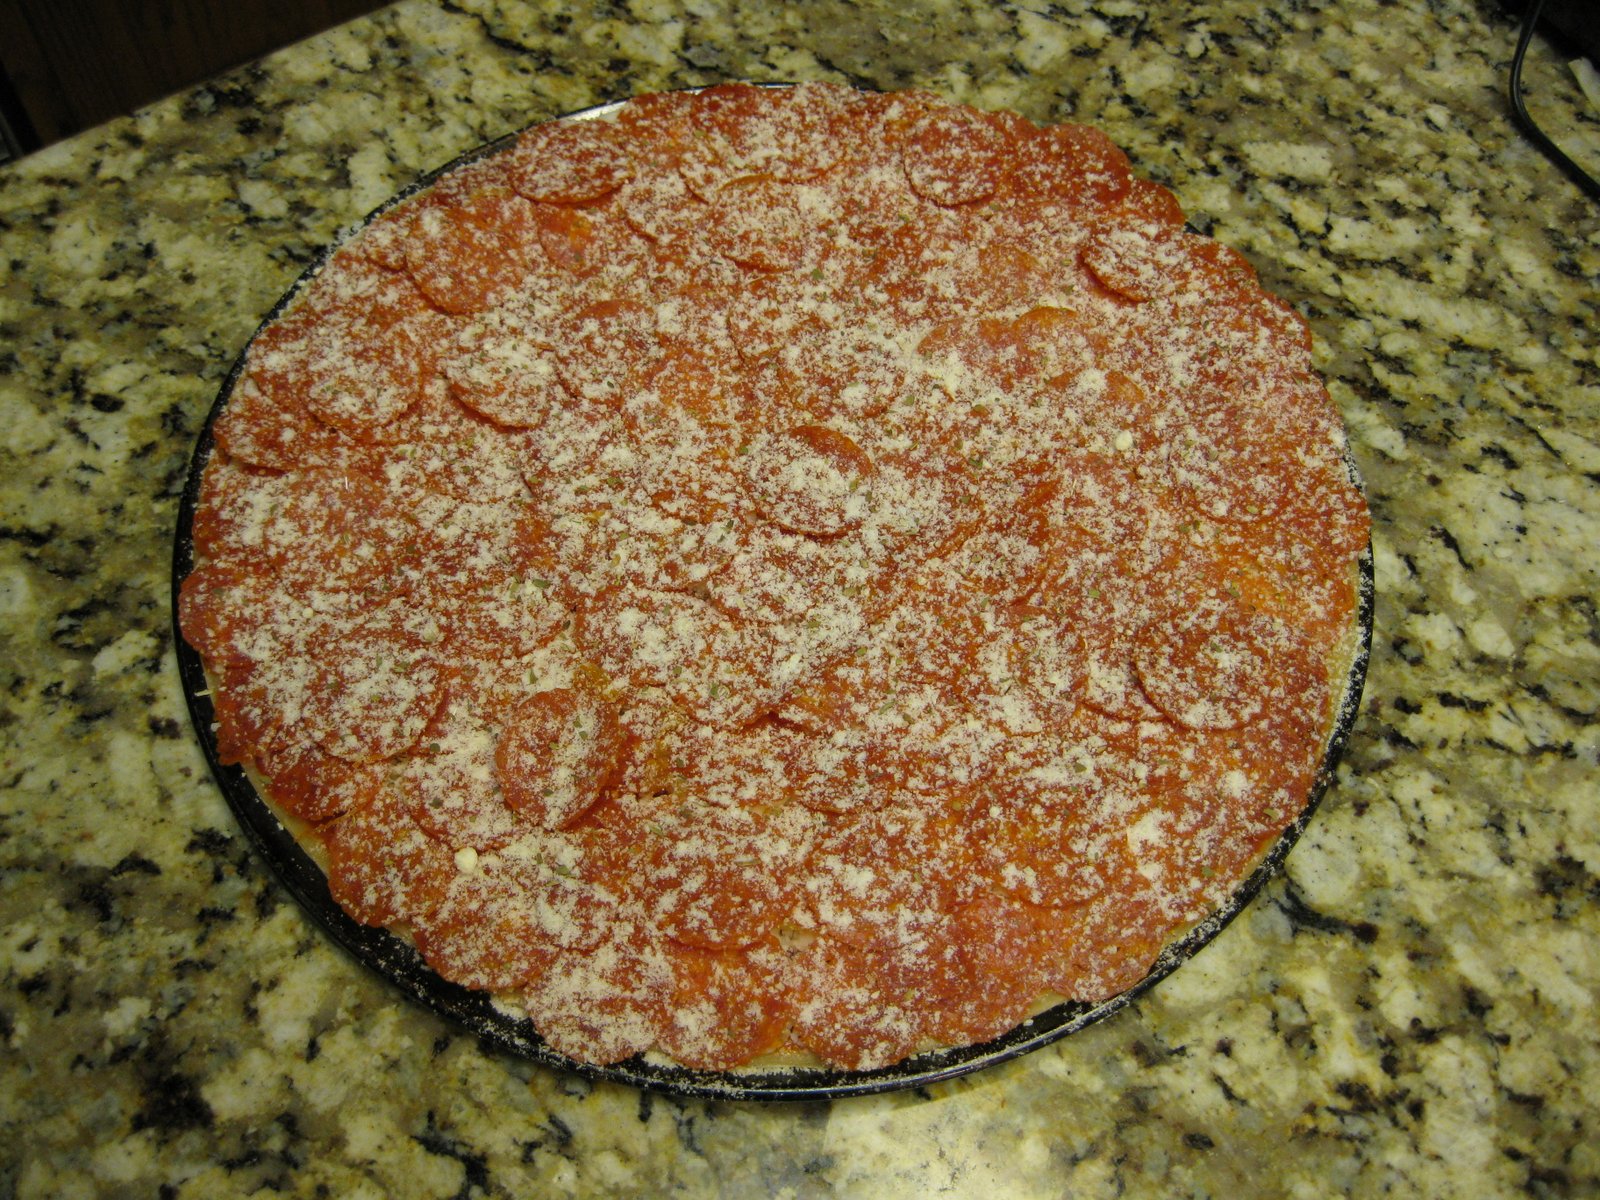
  12. Sprinkled with a romano and oregano mix just before baking.

  13. Bake at 500 until the cheese and toppings look like they're done. If the toppings are done but the crust is not done, remove the pan and allow the pizza to finish baking directly on the stone for another minute or two.
  14. When the pizza is finished, use a peel or a cookie sheet to remove the pizza from the oven.


  15. Just after baking.

  16. If you made a cheese pizza or a 1-topping pizza, use 5 cuts by 2 cuts (as shown below). If you topped with more than one topping, use 4 cuts by 2 cuts.


  17. 14" single-topping pizzas are cut 5 cuts x 2 cuts. If there had been more toppings,
    this pizza would have been cut with 4 cuts x 2 cuts.

  18. Eat.
If you refrigerate the other dough skin, be sure to remove the skin from the fridge at least a couple hours before you intend to use it. As soon as you remove the skin from the fridge, place the skin on a pan with the cornmeal side down. Then spray the top side of the dough with nonstick spray and leave uncovered at room temperature until you top the skin.

After that, top and bake as I've already instructed.

Here are some more pictures of my attempt at cloning Donatos:

Profile of the pizza after some pieces have been removed.

Showing the bottom of one slice.

Showing the rigidity of this pizza. (This one was probably a little too rigid.)

Showing what it's like beneath the cheese and pepperoni.

Reasonably close up profile shot of a slice.

Here's a very good recipe for Donatos sauce:

12 oz Tomato paste
20 oz Water
1/2 tsp Basil
1/4 tsp to 1/2 tsp Salt

A couple more things:

Donatos uses Biery provolone cheese. I'm not sure what kind of pepperoni they use, but if you can get your hands on Ezzo GiAntonio 38mm pepperoni, you'll like it. (You can order this pepperoni in 1 lb packages from PennMac.)

I've still only tried to clone Donatos once so far (two pizzas), but as I already said, I pretty much nailed it. Here's a link to my first post (of many) in a Donatos thread on pizzamaking.com. I tried to use this blog post to recap everything I shared on pizzamaking.com (in a more ordered fashion), but I may have missed some details. So you might want to check out what I had to say there.

I may have more to add to this post.

Sunday, September 30, 2012

Tommy's Pizza (Columbus, Ohio) clone

Like this blog on Facebook!
The most useful pizzamaking lesson you'll ever learn.

[This is a good post, but I made a lot of breakthroughs during the summer of 2013. There is a very important update at the end of this post. The update contains a major formula change, which is light years better than the formula I used prior to 8/3/13. But I've shared even more recent breakthroughs in a very thorough, step-by-step list of instructions at Reply #332 of the Tommy's thread on pizzamaking.com. (This link is supposed to take you straight to Reply #332, but it doesn't, so you'll probably need to scroll down quite a bit.)]

This style of pizza has kind of become my specialty because a couple years ago someone on pizzamaking.com started a thread asking if anyone knew how to make a Tommy's clone. At the time, I had no clue how to clone Tommy's, but I gave it a try anyway. My first attempts were not even close, but I kept trying, using my failures as a learning tool. Two years later, I probably know more about how to make a vintage Tommy's-style pizza than anyone, possibly including the owners of Tommy's.

This post will teach you everything you need to know about how to make a near-perfect clone of the pizza Tommy's produced 20 years ago. (Nowadays Tommy's just isn't the same as it was back then. If you go to Tommy's today, it won't look like the pizzas in my pictures, nor will it be nearly as good as the pizzas in my pictures.)

Whole Tommy's-style pepperoni pizza made at home. (This one didn't actually turn out
quite like a Tommy's pizza, but it was my most photogenic whole pie, so I used it here.)

Side view of a slice, showing separation between the laminates.

After about a hundred attempts at cloning this pizza (if not more), I've finally settled pretty confidently on this dough formula:

100% KAAP flour
56% Water
1% ADY
2% Salt

To make two 11" pizzas (or one 15" pizza), here's an appropriate dough recipe:

18.78 oz KAAP flour
10.52 oz Water
2.35 tsp ADY
2.73 tsp Salt

Special equipment you'll need for this pizza:

All right. So let's make one of these pizzas. The following directions are specifically to make one 11" pizza (although the recipe makes enough dough for two 11" pizzas or one 15" pizza).

Here's how to make the dough:
  1. Measure the appropriate quantity of yeast (2.35 tsp) and put it in your mixer bowl.
  2. Measure the appropriate quantity of 110-degree water (10.52 oz) and pour about 2 oz of it into the mixer bowl.
  3. Stir the yeast water to make sure there are not clusters (or clumps) of yeast.
  4. Measure the appropriate quantity of flour (18.78 oz) and set aside.
  5. Measure the appropriate quantity of salt (2.73 tsp) and add it to the flour.
  6. Use a wire whip or spoon to incorporate salt into the flour.
  7. Check the yeast water. If it is foamy, it means the yeast is alive and hydrated, so move on to the next step. If the yeast water is not foamy, wait 5 minutes and check again. After 5 minutes, go ahead and move on to the next step, even if the yeast water is not foamy. (The yeast is probably fine, but be aware that this may mean your yeast is dead. So if your pizza ends up showing no sign of fermentation, buy some new yeast and try again.)
  8. Add the rest of the water to the mixer bowl.
  9. Add the flour/salt mixture to the mixer bowl.
  10. Place the mixer bowl in its place on the mixer and attach the dough hook.
  11. Mix the dough for about 3 minutes, or until it looks about like the dough in the picture below.


  12. This is how the dough should look when it's finished mixing.

  13. If you've used the amount of ingredients called for in my recipe above, divide the dough into four 7.5-ounce pieces of dough.
  14. If you only intend to make one pizza, put two of the dough pieces in a ziploc bag and refrigerate. If you intend to make two pizzas, skip this step. (IMPORTANT: Each pizza you make will use two pieces of dough.)
  15. Place the pieces of dough that you'll be using on a pan that's comfortably bigger than the space occupied by the pieces of dough, with a couple inches between each dough piece, then cover the dough with a large plastic bowl (inverted).
  16. Let the dough rise at room temperature for about 4 hours.

Once the dough is ready to use, follow these instructions.
  1. Preheat your oven to 500 degrees, with a baking stone on the bottom rack.
  2. After the oven has preheated for about half an hour, place the pieces of dough on your work surface.


  3. Two pieces of dough waiting to become a dough skin.

  4. Use your fists to flatten the two pieces of dough as much as you can.


  5. After smashing the pieces of dough (with my fists) until the dough is flat.

  6. Coat each piece of dough with bench flour and set one of the dough pieces aside.
  7. Roll one piece of dough into roughly a square shape. If the dough sticks to the counter while you roll it, add just enough bench flour to keep it from sticking.
  8. As the dough reaches dimensions of about 10" x 10" (if you are making an 11" pizza), stop adding bench flour and allow the dough to stick to the counter a little as you roll it. (If you keep flouring the dough after this point, you'll never be able to roll it as thin as you need to.)
  9. Once the dough has reached dimensions of at least 14" x 14", dust the top of the dough with bench flour (as pictured below). It's OK to use a little more flour than I used in the pic.

  10. Roll the dough until it's almost as thin as possible, then add bench flour.

  11. Fold the dough in half and dust the top with bench flour.


  12. Fold the dough in half, then add bench flour.

  13. Fold in half the other way, making the dough relatively square, with four layers of dough.


  14. Fold the dough in half the other way. There should now be four layers of dough.

  15. Set this piece of dough aside and grab the other piece of dough.
  16. Repeat Steps 5-9 with the second piece of dough.
  17. When you're finished with all these steps, you should have two flat pieces of dough, each with four laminates.


  18. Both pieces of dough after rolling and folding.

Now catch your breath for a minute and resume the rest of the dough-rolling process.
  1. Stack one piece of dough on top of the other.


  2. One piece of dough on top of the other, before rolling into a dough skin.

  3. Use your fists to press the two pieces of dough together.
  4. Using bench flour when necessary, roll the dough until it is just a hair bigger than your pan.
  5. When the dough is slightly larger than the pan, set the pan atop the dough and use a pizza wheel to cut off the excess dough.


  6. Using a pan as a template to cut the dough to the right skin size.

    Showing how I use a pan as a template to cut the dough skin.

  7. Weigh the dough. (At this point the dough will still be a couple ounces heavier than you ultimately want it. That is, it will probably weigh about 13 oz.)
  8. Roll the dough some more, until it is about an inch bigger than the pan.
  9. Trim and weigh the dough again. Continue this process until the dough is the weight you want. (Put the dough scraps in a bag and immediately into the fridge. If you intend to make another batch of this dough within the next few days, you can add small pieces of this dough to the next batch as it mixes. If you don't plan to make any more Tommy's dough, you can make a pizza out of the scraps at any time over the next few days.)


  10. Dough skin on scale, showing that the skin weighs about 11 oz.

  11. Once you have trimmed your dough to the target weight of 11-11.5 oz, roll the dough just a little bigger than the pan you'll be using (because dough always snaps back to a smaller diameter after you roll it).
  12. If you are satisfied that your dough skin is as big as it needs to be, go ahead and spray the pan with nonstick spray, then place your dough skin on the pan. Note: This dough should not be docked.
  13. Adjust the dough skin with your hands to make it fit the pan.
  14. [Optional] If you don't want to bake the pizza until later in the day, it is OK to refrigerate the skin for up to at least 10 hours. When I do this, I put the skin on the sprayed pan and apply the sauce, to keep the dough from drying out while it sits in the fridge for hours. (Also, when I'm almost ready to bake, I remove the skin from the fridge 15 or 30 minutes before I intend to begin baking.) If you leave the dough skin at room temperature for very long (without refrigerating), the skin will continue to ferment (rise), and the pizza will end up bready, without any layers. If you refrigerate the skin for a couple hours (or longer), the bottom of the crust will likely blister while the pizza bakes.

Now let's top the pizza and bake.
  1. Top the skin with about 5 oz of sauce. Distribute the sauce all the way to the edge of the skin. (I normally would not use anywhere near this much sauce, but I can't taste this particular tomato product unless I use that much. I'll give you a sauce recipe below, and I'll also explain why I use this tomato product.)


  2. Skin with sauce, showing that I use a lot of sauce on this one.

  3. Add about 6.5 oz of provolone or mozzarella cheese. (I'm pretty sure Tommy's uses provolone, but mozzarella works just fine.) Make sure to apply the cheese all the way to the edge of the skin.
  4. Add whatever toppings you want above the cheese.


  5. Dough skin topped with sauce, cheese, chicken, bacon, and jalapenos.

  6. Sprinkle parmesan or romano cheese over the top of the pizza.
  7. Open your oven door and set the pan on the baking stone (on the bottom rack).
  8. Bake.
  9. After about 7 or 8 minutes, start watching the pizza carefully through the oven window because the crust will probably begin to bubble at about this point. Once you start seeing bubbles, quickly use a grill fork to pop the bubbles. Close the oven door as soon as possible.
  10. Once the pizza has been baking for about 10 minutes, use a pot holder or pan grabber to pull the pan out from under the pizza. (If you did not thoroughly preheat your stone, the pizza may not be ready to leave the pan for another few minutes. If the pizza does not easily come off the pan, don't force it. Instead, give it a couple more minutes on the pan before pulling the pan and moving on to the next step.)
  11. Let the pizza finish directly on the stone for another minute or two.
  12. After this time is up, use a metal peel (or cookie sheet) to retrieve the pizza from the oven.


  13. Overhead view of a chicken, bacon, and jalapeno pizza.

  14. Set the pizza on a screen or cooling rack for a minute before cutting.
  15. Cut the pizza. (For an 11" pizza, cut it into rectangles, using four cuts one way and two perpendicular cuts, as pictured.)


  16. Overhead view of a cut pizza. 4 cuts by 2 cuts.

  17. Eat.

And here are some more good pictures of Tommy's style pizzas I've made. Scroll below these pictures to find out how to make sauce for this pizza.

Profile of a pizza just after baking.

Side view of a Tommy's Pizza clone slice with a couple bites out of it,
showing separation between the laminates.

Side view of a slice, showing separation.

This is how I remember the bottom of Tommy's Pizza crust when I was a kid.
If you go to Tommy's today, it won't look like this.

Bottom of a Tommy's Pizza clone slice.

This is my favorite Tommy's Pizza clone pic because I think it shows how crispy
and flaky the bottom of the crust is when you do it right.

This is the one picture that shows I made a pretty damn good clone of Tommy's
Pizza: Lotsa little flakes from the bottom of the crust.

Now for the sauce recipe (which I haven't quite perfected yet):

1 28 oz can of Dei Fratelli crushed tomatoes
1/2 tsp dried basil
2 tsp dried oregano
1/2 tsp salt

Dei Fratelli crushed tomatoes.

I want to make it clear that I don't particularly like Dei Fratelli crushed tomatoes. The only reason I use them is because I think they may be essentially the same product as the crushed tomatoes Tommy's uses for their sauce. Last time I ate at Tommy's, I did a little investigating in their dumpster. In their dumpster I found a box for Star Cross crushed tomatoes (see below). After I mentioned the details of the box on the Tommy's thread at pizzamaking.com, someone responded by saying Dei Fratelli may be the same product, since both products are packed by the Hirzel Canning Company of Toledo, Ohio.

Having gone through a few cans of Dei Fratelli crushed tomatoes, I feel pretty confident that they are very similar to the Star Cross crushed tomatoes (if they're not the same thing). Like I said, I don't think this tomato product is very good. But it's probably the right thing to use if you really want to clone Tommy's.

Star Cross crushed tomato box 1.

And here's something else I found in the dumpster, which I think is a very important part of cloning Tommy's. Usually it's very difficult to get pepperoni like this without buying an entire case (25 lbs), but PennMac breaks up cases of Ezzo pepperoni and repackages it in 1 lb bags. I'm not sure if the Ezzo pepperoni available from PennMac is GiAntonio or if it's some other Ezzo variety.

I did some dumpster diving at Tommy's and found that they use
Ezzo GiAntonio 38 mm pepperoni.

Tommy's menu indicates that their pizzas are available in sizes of 11", 13", and 15". However, if you order a 15" pizza at Tommy's, the pizza they bring you is only 14". And if you get a small box for your leftovers, the box is 10", not 11". This incorrect menu information is not an accident. It's not because Tommy's recently changed the sizes of their pizzas but haven't had a chance to update the menu. It's not because the pizzas shrink an inch while baking (because the pizzas don't shrink). Although I think their pizzas used to be 11", 13", and 15" once upon a time, their current menu's misrepresentation of sizes is clearly a deliberate attempt by Tommy's ownership to mislead their customers, and I have a big problem with that. You should too.

So next time you think about buying pizza from Tommy's, I invite you to instead try to make it yourself by following my instructions. (Joseppi's and Cappy's also lie about the size of their pizzas, so maybe I'll make an effort to figure out how to clone their pizzas soon, too.)


Update (10/1/12): Just after I finished writing this post, I saw that there was a relatively new post on the Tommy's thread at pizzamaking.com. The new contributor, fatzo, speculated that there may be red wine in Tommy's sauce, and I feel like he(?) just may be right about that, even though I had never thought about anything like that before. Something to think about. (If you read that post, go ahead and read the post right before it, too, also from fatzo.)


Update (10/2/12): This just occurred to me. I think I need to use a bleached all-purpose flour, rather than KAAP, which is unbleached.

I was just looking at some pics of an actual Tommy's pizza, and I realized how much whiter their pizza is than my clone. I was already aware of this, I guess, but apparently I needed to see the pictures again for it to register. So whenever I make another Tommy's clone, I will use a bleached all-purpose flour.


Update (8/5/13): I made some Tommy's style pizzas Saturday for the first time in a long time, for a pizza party. My dough formula was supposed to be kind of a Tommy's/Shakey's hybrid, but I ended up making three nearly-perfect Tommy's clones. Here's the formula I used:

100% Pillsbury AP flour
41.56% Water
1.96% ADY
1.5% Salt
2% Shortening
1.06% Sugar

To make 30 oz of dough, use:

20.26 oz Pillsbury AP flour
8.42 oz Water
3.97 tsp ADY
1.77 tsp Salt
0.41 oz Shortening
1.76 tsp Sugar

I made the dough about 24 hours in advance. Mix time was about 7 minutes (with spiral dough hook). Bulk fermented at room temperature for about 2-1/2 hours. Punched down and refrigerated for about 16 hours. Punched down again after I removed the dough from the fridge, then scaled dough, and allowed to warm at room temperature for an hour or two, then rolled, trimmed, DOCKED, and immediately put the covered dough skins in the refrigerator. Removed each skin 15-30 minutes before baking. Baked each pizza directly on stone at 500 for about 8 minutes. (That is, I didn't use a pan.)

The only thing I can think of that I did differently from the steps in the main part of this post is that I added no bench flour to the dough before folding. Oh yeah, and I docked the dough after the final trim, then baked directly on stone (instead of a pan). I also used Ezzo GiAntonio pepperoni on these pizzas, atop Grande whole milk mozzarella. Changes I plan to make with the next batch: ADY probably needs to drop a little, to about 1.5%; shortening should be increased from 2% to 3%; very small hydration increase.