Showing posts with label How to make Chicago deep dish. Show all posts

Thursday, October 25, 2012

Best-yet Malnati's style deep dish pizza

[Update (8/26/13): Even though the instructions in this post are very good, I think I've learned a lot about deep dish since publishing this post. Consequently, I may write an even better best-yet post pretty soon.]

After baking a deep dish pizza every day for at least a month, making slight changes with every pizza and every batch of dough, I'm confident that I've created a near-clone of Malnati's deep dish. Better yet, I can teach you how to make a near-clone of Malnati's.

Become a fan of this blog on Facebook!
The most useful pizzamaking lesson you'll ever learn.

I've made a few conscious decisions to stray from what I know is "the right way" to make Malnati's style deep dish (like using only corn oil in the dough, instead of using corn oil and olive oil). Still, this stuff is primo, and you will not find another source that can teach you how to make a better Malnati's style deep dish pizza. If you don't believe me, just scroll down and look at the pictures. Then go look at actual Malnati's pictures. (Just realize that not all of those pics are actually of Malnati's pizza. Also, you may notice that real Malnati's pizzas look a little different than the pizzas shown in Malnati's advertising/menu pics, just as my pizzas look a little different than their ad/menu pics. There's a reason for that.)

Removing the first slice from a Malnati's style deep dish pizza that just came out of
the oven. Hopefully you can see the melted mozzarella oozing from the sides of the slice.

Slice of a Malnati's style deep dish pizza.

Here's some good news: This style of pizza is very easy to make and very hard to screw up, but only if you follow the instructions of someone who knows what they're talking about, like me (or Ed). As long as you have a scale and a pan that resembles a deep dish pan, you should be able to make a very good deep dish pizza. And if you don't have a scale, you need to get one because it is impossible to accurately measure ingredients by volume (measuring cups). Furthermore, if you don't have a scale, it is impossible to measure the proper amount of dough to use for any particular size of pizza. I'm here to help you make great pizza that you can reproduce any time you want, not merely edible pizza that will be different every time you make it. It's easier to make good pizza than it is to make bad pizza, but only if you make a choice to forget everything you think you know and, instead, follow these instructions precisely. And if your first pizza doesn't come out as good as you hoped, try again. You'll do better with each try.

The dough formula for this pizza is very simple. As you read the short list of ingredients, you will surely notice that I include neither cornmeal nor salt in this dough. Here's why: Contrary to what you've heard almost everywhere else, Malnati's dough (i.e., real deep dish dough) contains neither cornmeal nor salt. Here's proof.

So anyway, here's my formula (and here's a post that will help you understand what it means). Update (8/20/13): You might want to decrease the hydration by about 5% because my formula creates a very soft dough, which I'm beginning to think may be too soft.

100% Pillsbury bleached all-purpose flour
58% Water
0.5% ACTIVE DRY YEAST
22% Corn oil

To make 18 oz of this dough (which is a little more than enough for two 9" pizzas), use the following recipe:

9.97 oz Pillsbury bleached all-purpose flour
5.78 oz Water
0.50 tsp ACTIVE DRY YEAST
2.19 oz Corn oil

If you need to make a different quantity of dough, or if you have a metric scale, just go to the dough calculator on pizzamaking.com and plug in the percentages I've listed above, as well as figures that more appropriately suit your needs. This calculator is very easy to use. If you have any trouble understanding how to use it, just mess around with it for a few minutes.

Specialized equipment you'll need for this pizza:
  • A kitchen scale that measures in ounces.
  • A tin-plated steel deep dish pan or an aluminum cake pan. If you don't have either kind of pan, just use whatever you can get your hands on. Here's a post that teaches you how to season a deep dish pan. (Scroll down to below the picture of a pan with tools in it.)
  • Baking stone (optional but recommended).

Here are step-by-step instructions for how to make this dough by hand. I've worked hard to try to make these instructions easy to follow yet informative at the same time. I have included additional information in many of the picture captions, so be sure to read the captions if my instructions aren't clear. Start by gathering your ingredients: Pillsbury bleached all-purpose flour, ACTIVE DRY YEAST, corn oil, and 110-degree water.
  1. Measure the appropriate quantity of yeast (0.5 tsp) and put it in a custard dish or small bowl. Optional but recommended: Add a pinch of sugar to the yeast.


  2. 1/2 teaspoon of yeast with a pinch of sugar.

  3. Measure the appropriate quantity of 110-degree water (5.78 oz) and pour about half an ounce into the custard dish. Stir the yeast water.


  4. Immediately after adding less than an ounce of 110-degree water to the yeast and stirring.
    Notice that you can clearly see the grains of yeast, as they have not been hydrated yet.

  5. Measure the appropriate quantity of flour (9.97 oz) and set aside.
  6. Measure the appropriate quantity of corn oil (2.19 oz) and set it aside. (The yeast jar in the following pic is just there for scale, to give you a good visual idea of how much corn oil to use.)


  7. Showing about 2.2 oz of corn oil and a jar of yeast (for scale).

  8. When the yeast water is foamy on top, as pictured below, move on to the next step. (Even if it's not foamy after hydrating for ten minutes, go ahead and move on to the next step, but be aware that your yeast may be dead.)


  9. Yeast water after hydrating for 10 minutes. You cannot see any grains of yeast, and the top
    is somewhat foamy and bubbly. This is a clear sign that the yeast is 1) fully hydrated,
    and 2) alive. This indicates that it's time to mix the dough.

  10. Add all the liquid ingredients to your mixing bowl (water, yeast water, corn oil).


  11. Water + yeast water + corn oil.

  12. Add the flour to the mixing bowl.


  13. After adding 9.97 oz of all-purpose flour to the wet ingredients.

  14. Stir the mixture until it all comes together into a cohesive mass of dough.


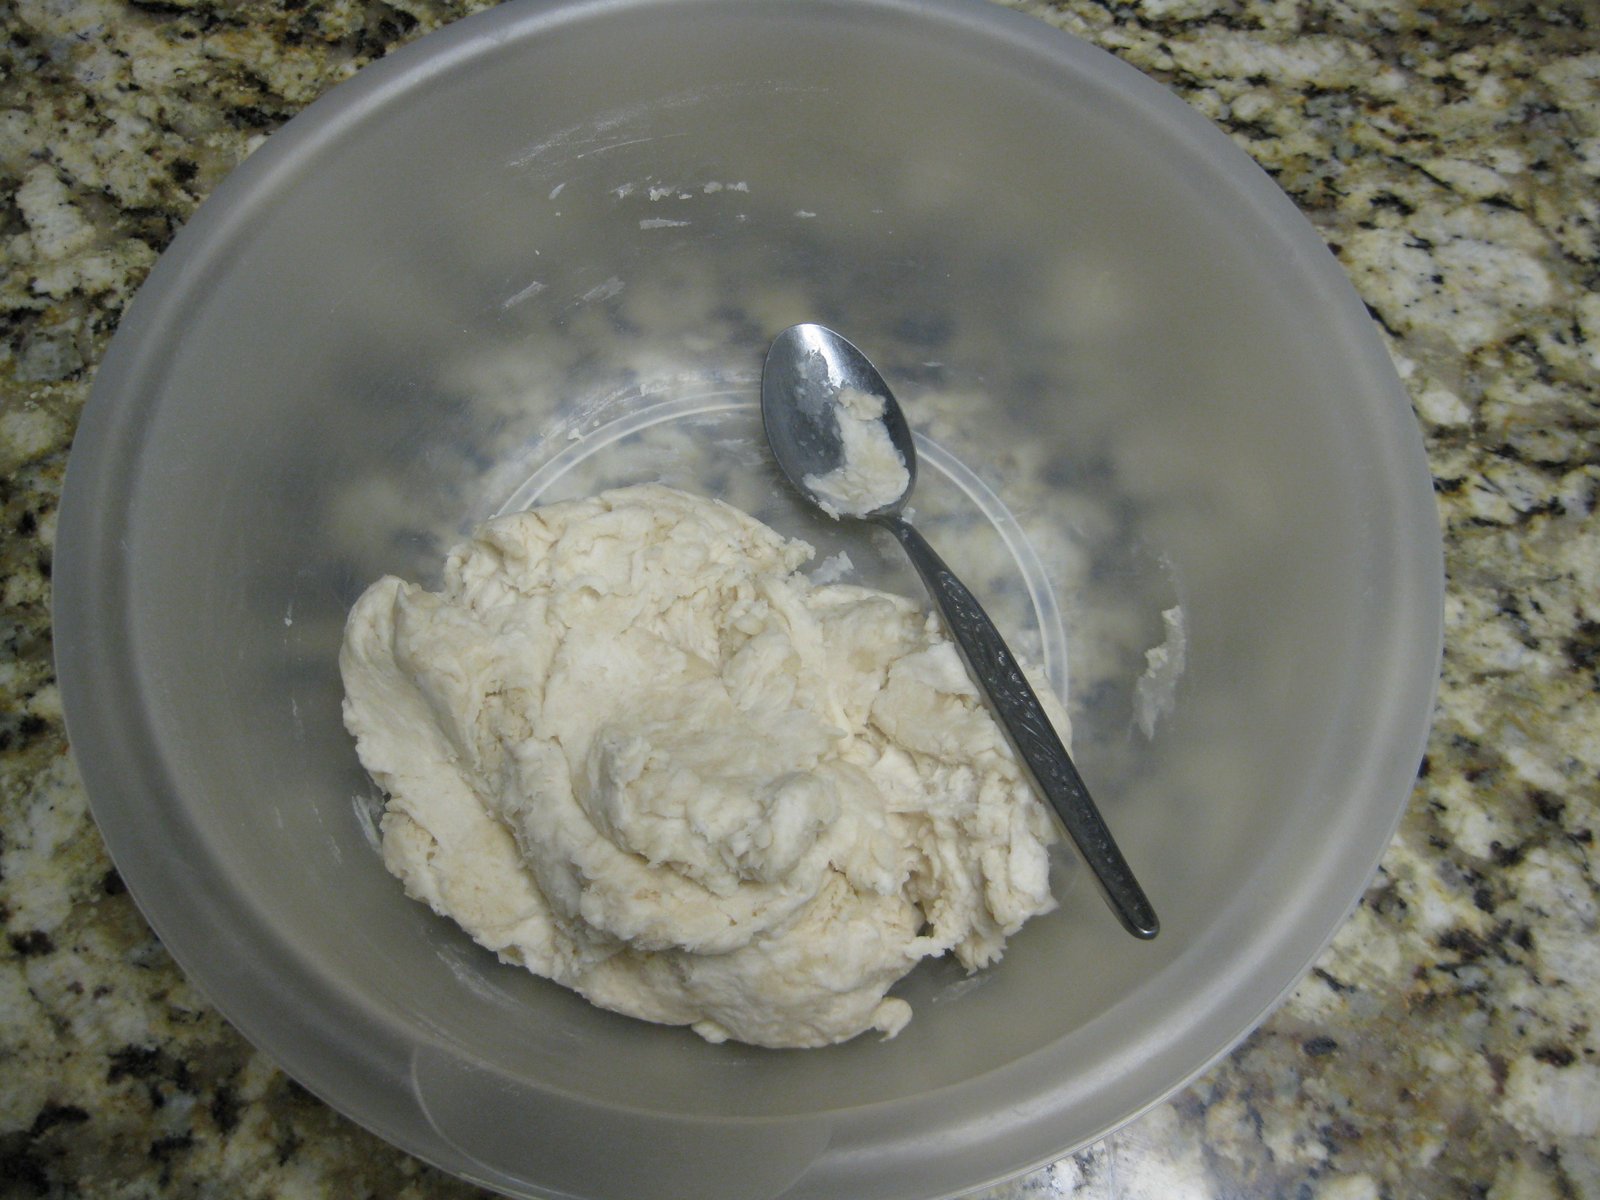
  15. I mixed the Malnati's style deep dish dough entirely with the spoon.
    It just takes a minute or so.

  16. If you have a plastic dough scraper, use it to gather any small pieces of dough that may be sticking to the sides of the bowl.


  17. Even though the Malnati's style deep dish dough mixes up pretty cleanly, I used a plastic
    dough scraper to gather all the little bits of dough that stuck to the bowl.

  18. Place the dough in a sealable plastic bag and refrigerate (unless you plan to make a pizza within the next 3-5 hours). If you plan to make a pizza within the next 3-5 hours, move on to Step 2 of the next section of instructions.


  19. Even though I may have used this Malnati's style deep dish dough later the same day,
    I still bagged it all up and put it in the refrigerator.


OK, so that's how you make deep dish dough by hand. You can use this dough as soon as three hours after you mix it, but if you keep it refrigerated you can use it at any time over the next 48 hours (or possibly longer). The following instructions are useful either if you plan to make the pizza considerably later in the same day or if you plan to make the pizza a day or two later. (If you plan to make the pizza as soon as possible, follow these instructions immediately after you mix the dough, but give the dough at least 3 hours to rise in the pan and make minor intuitive changes when necessary.)

The following instructions are to make exactly one 9" deep dish pizza.
  1. A couple hours before you intend to bake a pizza, remove your bag of dough from the fridge.
  2. Remove the dough from its bag and scale 8.2 oz of dough. (Put the remaining dough back in the fridge.)


  3. About 8.5 oz of Malnati's style deep dish dough, which is a little more
    than my guidelines suggest for a 9" pizza. (It worked just fine.)

  4. Optional: Grease the pan by pouring a little corn oil or pure olive oil into the pan you'll be using. Even though I think Malnati's oils their pans pretty liberally, I prefer to oil the pan very lightly or not at all. The following picture shows a pretty heavily oiled pan.


  5. Oiling the pan before placing the dough inside to warm up or rise. Even though I think
    this quantity of oil is probably pretty representative of how much oil Malnati's uses, it
    is more oil than I intended to use, and it is more oil than I prefer to use. I have used both
    corn oil and pure olive oil to oil the pan, and both work fine.

  6. Place the dough in the pan.


  7. I distribute the oil evenly throughout the pan before placing the dough in the pan.
    This is about 8.2 oz of Malnati's style deep dish dough, and it's in a 9" pan. Usually when I
    put dough in the pan, the dough is cold because it has been in the fridge for a day or two.

  8. Cover the pan. After an hour or two, set your oven to bake at 450 degrees, with a baking stone on the bottom rack.
  9. After the oven has preheated for at least half an hour, uncover your pan. The dough should be noticeably bigger than it was when you put it in the pan, but it shouldn't be anywhere near double the original size.


  10. The same dough as the previous picture, but exactly two hours later. Notice that it has
    clearly risen over the 2-hour warm-up period, but it hasn't even come close to doubling.
    This is when I prefer to use it, but it's OK to give it another two or three hours.
    I'll show a five-hour rise of similar dough toward the end of this post.

  11. Flatten the dough so it occupies the entire bottom of the pan, then crimp the outer edge of the dough so it reaches about 1-1/4" up the side of the pan. (Brush some melted butter onto the dough if you desire. I can't taste any difference when I do this.)


  12. Malnati's style deep dish dough after forming. The sides go up to about 1-1/4".

  13. Place about 6 oz of sliced mozzarella on top of the dough, then add sausage or any other toppings atop the cheese.


  14. Small pieces of raw sausage on top of 6 oz of sliced mozzarella. (Don't be afraid
    to do this. The sausage will cook.) Malnati's probably uses a little more sausage than I did.

  15. Spoon or ladle about 9 oz of chunky canned tomatoes atop the cheese and toppings. (Scroll way down to learn about the tomatoes I think are perfect for this pizza.)


  16. This is about 9 oz of tomato strips on what will soon be a 9" Malnati's style deep dish
    pizza. I use this tomato product straight out of the can. Even though most of my
    other pics show enough tomato to cover the cheese entirely, I like to use a little
    less than that; sometimes even less than what I've used in this pic. If it looks a
    little wet to you, it's because it is a little wet. That's OK. I have also tried using
    these tomatoes with a heavy puree to make it less watery, but it was nowhere
    near as good as using the tomatoes straight out of the can.

  17. Sprinkle romano or parmesan cheese on the tomatoes, as well as some oregano if you like oregano.


  18. After shaking a little parmesan cheese onto the tomatoes.

  19. Place the pan in your 450-degree oven and bake until the outer edges have slightly browned and pulled away from the side of the pan. (This should generally take about 22-25 minutes.)


  20. Baking a Malnati's style deep dish pizza on the bottom rack in the oven,
    on a preheated stone at 450 degrees.

  21. Remove the pizza from the oven and cut it. (You can cut it right in the pan and serve it in the pan, which is standard if you dine in at Malnati's, or you can remove the pizza from the pan and cut it on a peel or cutting board.)


  22. Malnati's style deep dish pizza, immediately after baking for 29 minutes at 425 degrees.
    Showing pan gripper in action. I've come to prefer baking at 450 degrees for 22-25 minutes.

    Malnati's style deep dish pizza with one slice gone.

And here are some other pics of finished deep dish pizzas:

Bottom of the Malnati's style deep dish pizza.

Profile of a Malnati's style deep dish pizza slice.

Whole Malnati's style deep dish pizza.

Profile of a Malnati's style deep dish pizza.

Whole Malnati's style deep dish pizza.

Whole Malnati's style deep dish pizza, with pepperoni under the sauce.


The following information is my suggested dough, cheese, and sauce weights for every size between 6" and 14". The formula I've used to calculate these numbers is not perfect, but I think it's pretty close. If the sides of your pan are sloped, you should use the pan's bottom diameter.

Even though I have six different sized deep dish pans, I've only used the 9" pan since I began my quest to perfect deep dish pizza. This means the ingredient weights I list for a 9" pizza are more trustworthy than every other size. Consequently, I'll list the suggested 9" ingredient weights before every other size.

9" deep dish pizza
8.16 oz of dough
6.00 oz of cheese
9.06 oz of tomatoes


6" deep dish pizza
3.82 oz of dough
2.59 oz of cheese
3.91 oz of tomatoes

7" deep dish pizza
5.09 oz of dough
3.57 oz of cheese
5.39 oz of tomatoes

8" deep dish pizza
6.53 oz of dough
4.71 oz of cheese
7.10 oz of tomatoes

10" deep dish pizza
9.97 oz of dough
7.45 oz of cheese
11.25 oz of tomatoes

11" deep dish pizza
11.97 oz of dough
9.06 oz of cheese
13.68 oz of tomatoes

12" deep dish pizza
14.14 oz of dough
10.82 oz of cheese
16.35 oz of tomatoes

13" deep dish pizza
16.49 oz of dough
12.75 oz of cheese
19.25 oz of tomatoes

14" deep dish pizza
19.02 oz of dough
14.83 oz of cheese
22.39 oz of tomatoes

Attention: My recommended dough weight creates a pizza that's probably too thin for most people's tastes. Having made many more deep dish pizzas since I wrote this post, I've made some changes to the suggested ingredient weights of a 9" pizza, which I've described in the update at the bottom of the post. As you may have guessed, I prefer the updated weights, even though I'm not sure if they accurately reflect the weights of a real Malnati's pizza.


Sauce for deep dish pizza

For deep dish sauce I use Stanislaus Saporito Filetto di Pomodoro (tomato strips, pictured below), uncooked and with nothing added. Sometimes I use the tomatoes straight out of the can, but I'm beginning to prefer a sauce that's slightly less chunky. To make the tomatoes slightly less chunky, I pulse them a couple times in a food processor. Pulsing them just a couple times keeps them chunky but makes the chunks a more appropriate size. It really is that easy.

Unfortunately, you probably will not be able to find a store that stocks these tomatoes. (If you live in central Ohio, you can get them at Carfagna's, on 161 just east of I-71.) If you are unable to find this brand of tomatoes, I suggest buying canned whole tomatoes. You can either coarsely chop them on a cutting board or pulse them about five times in a food processor.

A lot of knowledgeable home pizzamakers use cans of diced tomatoes mixed with cans of crushed tomatoes, but in my opinion diced tomatoes are too firm to make a good deep dish pizza. Also cans of diced tomato contain way too much water. Whole tomatoes are softer and fleshier than diced tomatoes, and they are almost always packed in puree. So not only do I consider them better tomatoes for this kind of pizza, but it also takes a lot less work to prepare them.

Important: Do not cook the tomatoes. If you want the tomatoes to be less watery, just drain the water (or preferably, drain some of the water).

Stanislaus Saporito Filetto di Pomodoro (tomato strips).
If you can find a place that sells this by the can, buy it.
You can get a very similar product here.

Stanislaus Saporito Filetto di Pomodoro tomato strips. This product works very well
for deep dish. You don't have to use this particular tomato product, but this and the
next pic give you a good idea of what kind of tomato product you want
to use for Malnati's style deep dish pizza.

Another way of showing you the texture of these tomatoes.


Updates and Improvements (12/11/12)

I've made some serious improvements since composing the rest of this post, beginning with a slight formula change:

100% AP flour
52% Water
0.5% ADY
22% Corn oil

To make a little more than enough dough for two 9" pizzas (20 oz), here is a dough recipe:

11.46 oz AP flour
5.96 oz Water
0.57 tsp ADY
2.52 oz Corn oil

Here's a procedural change that seems to work much better than what I've instructed above: Once you've measured all the dough ingredients, add the flour to the mixing bowl, then add the corn oil to the flour. Whisk to incorporate the oil uniformly into the flour. Once you've done that, add the water and yeast water, then mix as normal.

IMPORTANT: One thing I cannot emphasize enough: UNDERMIX THE DOUGH!!! Basically just mix the dough until it all comes together. (It will still be very lumpy when it's finished mixing.) Once you reach this point in mixing, if there are still small pieces of dough and oily clumps of flour on the side of the mixing bowl, just scrape them off and add them to the main piece of dough. DO NOT KNEAD THIS DOUGH, as gluten development is a very undesirable characteristic with this style of dough.

Get it?

After much trial and error, I now think it's better to use more dough and cheese per pizza than I've instructed above. For a 9" pizza, here are my current dough and topping weight recommendations:

8.5 to 9 oz of dough
7.5 oz of sliced mozzarella
Raw sausage by feel (optional)
8-10 oz of uncooked, chunky, fleshy tomatoes

Note: 7 oz of cheese seems to be the magic number. That is, if you use more than 7 oz, you'll end up with a gooey, beautiful mess of cheese that oozes off each slice when you remove the first few slices from your cut pizza. But if you use any less than 7 oz, the magic probably won't be there. If you want mega mega gooey cheese, try using 9 oz of mozzarella.

One last thing: I've been baking my most recent deep dish pizzas at 470 for about 17 minutes (rather than 450 or 425 for 22-28 minutes). I think I like the pizzas better this way, but I haven't decided for sure yet.


Update (6/11/13)

Someone on pizzamaking.com followed these directions and started a thread about it, which includes at least one picture. Even though most of the posts on that thread seem to be about how I'm a total dick, you might still find it somewhat interesting. (I think maybe I'm glad I was banned, because I'm a better person now than I was when I wasted most of my time on that site.)

Also, a reader of this blog (in Japan, where it's very hard to find ingredients for this kind of pizza) sent me a couple pictures of the pizzas he made after following these directions several months ago. I intend to write a new post eventually, highlighting his results (and hopefully other people's results, too), but it might take me a while to find the motivation. If there is anyone else out there following these directions, I'd love for you to share your results, too. Thanks.


Update (7/31/13)

Here's something I just found that mentions me and links to this page. It's from John Dellavechia, the same person who mentioned this post on pizzamaking.com. His pizzas look real good and have much better photographic quality than mine.

Thursday, October 4, 2012

Deep dish in the style of realdeepdish.com

Become a fan of this blog on Facebook!
The most useful pizzamaking lesson you'll ever learn.

Since Ed Heller's deep dish dough formula is a little different than mine, and since he clearly knows his stuff when it comes to deep dish, I decided to give his formula a try yesterday. Unlike every other deep dish pizza I've made so far, I baked this one the same day I made the dough, after giving the dough a 6-hour room-temperature rise.

Showing the gooey cheese oozing off a slice of the recently-cut pizza.

Here's the dough formula I used:

100% KAAP flour
50% Water
0.85% ADY
0.7% Salt
12.5% Pure olive oil
12.5% Corn oil

And here's a recipe to make 30 oz of dough:

16.99 oz KAAP flour
8.5 oz Water
1.44 tsp ADY
0.69 tsp Salt
2.12 oz Pure olive oil
2.12 oz Corn oil

(I have not included step-by-step instructions in this post because I've already written essentially the same instructions in my original deep dish post. If anyone would like me to add step-by-step instructions, please say something in a comment.)

I mixed the dough in a KitchenAid mixer for about three minutes, which is a minute or two longer than I usually mix this kind of dough. The following pic shows the dough immediately after mixing.

30 oz of dough, just after mixing. I mixed this batch a little longer than I usually mix
deep dish dough. Still, I only mixed for about 3 minutes.

Two-thirds of the dough batch (20 oz), just after mixing. Ready to be refrigerated.

The other one-third of the dough batch (10 oz for a 10" pan), just after mixing. I
covered it with a plastic lid and let the dough rise in the pan.

After rising at room temperature for about 5-1/2 hours.

The first part of forming the dough skin: Pat the dough with your fingertips
and hands until the dough is flat and fills the bottom of the pan.

Then crimp the edges of the dough so it reaches about 1-1/4" up the side of the pan.
I probably didn't pull it quite that high, but that's OK with a cheese pizza.

This is about 8.5 oz of mozzarella. Not the greatest example of how it should
look (because I sliced the cheese by hand, with a knife, as opposed to a slicer).

Stanislaus Saporito Filetto di Pomodoro (tomato strips).
If you can find a place that sells this by the can, buy it.
You can get a very similar product here.

Stanislaus Full-Red Extra Heavy Tomato Puree. I used this
to thicken the sauce a little (because there is a lot of water in
the tomato strips). It worked very well.

About 11 oz of tomatoes/sauce on the 10" dough skin. Might be a little more than
necessary, but it worked just fine.

Sprinkled some parmesan over the tomatoes, with a very small hint of oregano, too.

Showing the oven/stone setup I typically use for deep dish.

Just out of the oven after a 22-minute bake at 450 degrees.

Just out of the pan. If you open this pic in a new tab, you should be able to zoom in
and see the texture of the side of the crust. This is not the texture I hoped for.

With one slice gone.

Verdict

Due to the large quantity of oil in this dough, the texture of my first pizza was too Pizza Hutty to me. I didn't care for this quality, and my memory of eating at Malnati's says their pizza doesn't have this quality. (If you didn't already know this, Pizza Hut's pan pizza is nothing like Chicago deep dish.)

Although I didn't like this crust as much as my normal deep dish crusts, my mom raved about the crust on this one, even though I didn't tell her it was any different than the other ones I've made lately. This shows that different people have different tastes, and sometimes what you like isn't what everyone else might like. Still, Mom has never eaten at Malnati's, and I have. To me, this pizza was less like Malnati's than the pizzas I've made with my own Malnati's clone dough. In fact, after making this one yesterday, I think my normal dough has too much oil in it as well.

It may be my own fault that this pizza came out sorta resembling Pizza Hut because I allowed the dough to rise in the pan, thus keeping me from handling the dough as much as I would've if I had allowed it to rise in a different container. Plus 6 hours was probably an excessively long rise, which may have played a role. I don't think my handling technique made the dough turn out this way, but it might have. Also, the fact that I used the dough the same day I made it may have contributed to the Pizza Hutty texture.

The great thing is that I get to make another pizza with the same dough (which has been refrigerated) later today, as well as another one tomorrow. I will recap those pizzas below, so check back sometime over the next few days.


Update (10/5/12): The crust of the second pizza made from this dough was not good. It seemed pretty good by the looks at first, but it just wasn't. It wasn't horrible, though, either. It just seems to me that it had way too much oil. I mean, the dough "bled" oil in the bag, even though it didn't feel oily immediately after I mixed the dough. My previous deep dish doughs have bled in the bag, too, but not nearly this much.

The way I see it, flour simply can't hold the amount of oil I put in this batch of dough. By the time I bake a pizza made of this dough, the dough contains a lot less oil than it contained when I mixed it. Yet even after bleeding all that oil, the dough still has too much oil, which makes the crust taste and feel nasty to me. So why put that much oil in the dough? And since my previous doughs (with 20% oil, rather than 25%) also bled oil, why use even 20% oil? I can't come up with a good answer for that, so I'm going to use less oil.

I won't be using the last piece of dough from the realdeepdish batch because it seemed overfermented yesterday, which means it should be even more overfermented today. Also, I just don't like that dough. (Ed, if you see this: Nothing personal, but I think your dough has too much oil.)

My latest batch of dough only uses 16% corn oil and 0% olive oil (rather than 12.5% corn oil and 12.5% olive oil). I changed the oil content so drastically for two reasons:
  1. 25% just seems like way too much oil to me, so I might as well make a drastic change (instead of a small one) to make sure I can clearly see how the change affects the end product.
  2. I don't really see the point in using two different kinds of oil. Using two different kinds of oil may help give the crust a hint of a particular flavor, but I doubt that it makes any kind of noticeable difference. To me using two different kinds of oil is just a way to unnecessarily complicate things. It adds a lot of extra work for no good reason. And one of my guiding pizzamaking principles is to keep everything as simple as possible, without complicating things. So why use two different kinds of oil?
Great food is not complicated. Great food is simple. And if you're trying to sell food, complicated food only takes longer to prepare, thus keeping customers waiting and the cooks frustrated; thus requiring extra labor to try to meet the demand. This leads to a snowball effect, which keeps everyone waiting for things that shouldn't require a wait. That pisses off customers, makes knowledgeable cooks find jobs elsewhere, and leaves that void filled by cooks who have no idea what they're doing, which creates a need for even more labor, which costs money. Eventually there is no customer demand because people don't want to buy bad food that takes too long to prepare. Ultimately, complicated food makes restaurants go out of business.

So don't complicate things at home, because the restaurants and pizzerias you want to copy don't complicate things. How do I know your favorite restaurants don't complicate things? Because they're still in business.

Simplicity = Good.


Update (10/6/12): The dough formula I used for the most recent batch of dough is as follows:

100% Meijer AP flour
52% Water
0.6% ADY
0.7% Salt
16% Corn oil

This dough is good (even using generic flour), but it needs a little work. It hasn't bled oil like the realdeepdish.com formula did, which is good. However, it is more elastic than it should be. Considering these things, I'm going to increase the oil percentage to 20% for the next batch, while leaving the hydration (water) percentage at 52%.

As I mentioned earlier, I suspect 20% oil is the upper limit of how much oil should be used in this kind of dough. So if this dough oozes oil, I'll know the oil percentage should be less than 20% (but more than 16%).

Honestly, the formula just above is very good already. It's just not perfect. Mainly it's just too elastic. And I can always tell by watching videos of Marc Malnati that Malnati's dough is not remotely elastic.


Update (10/8/12): I was wrong, sorta. Using 20% oil does not lead to dough that bleeds oil. (Or at least the dough I made yesterday, with 20% oil, has not bled oil.) Also, dough made with 52% hydration + 20% oil is not quite as soft and extensible as the dough Marc Malnati uses.

I wasn't all wrong, though.

Having just eaten a pizza made from this dough, here are my observations: Even though the dough did not bleed oil, I didn't like this dough as much as the previous batch of dough. Similar to pizzas made from the realdeepdish.com dough (with 25% oil), this crust had plastic-y qualities. That is, instead of being soft and biscuity, it ended up crunchy and tough. The previous batch of dough didn't do that.

The only difference between the last two batches is that this batch has 4% more oil. What that tells me is this: Instead of increasing the oil to make the dough softer and more extensible, I probably should have increased the hydration. So right now I'm leaning toward increasing the hydration of the next batch to at least 56%, while decreasing the oil percentage back down to 16%. (It'll be a few more days before I try it, though, because I still have enough dough to make two more pizzas.)

Also, I think I've been using considerably too much cheese.


Update (10/9/12): Forget almost everything I said in yesterday's update. I must have been high or something.

I just finished eating a pizza with a crust made from the same batch of dough as yesterday's dough, and it did not exhibit the characteristics that grossed me out yesterday. I can't explain it. I guess maybe overbaking caused the characteristics I didn't like yesterday (because it was definitely a little overbaked). Or maybe overmixing the dough created those characteristics. Anyway, not only have I decided not to decrease the oil percentage in my next batch of dough, but I have in fact decided to increase the oil percentage by 2%. Also, I'm gonna mix this batch by hand.

Posted by Picasa

Wednesday, September 26, 2012

Ryan's Chicago deep dish (Malnati's style)

(Like this blog on Facebook!)

Here's how to make a Malnati's style deep dish pizza. This post is a little incomplete right now because I have never taken pictures of some of the important steps. I took most of these pictures to document how a certain brand of tomatoes works for this kind of pizza. I will add more pictures as soon as I get a chance to make some more deep dish pizzas.

Specialized equipment you'll need to make this pizza: One deep dish pan or cake pan, 1-1/2" or 2" deep and seasoned. Ideally you'll want a tin-plated steel pan (with straight sides), but you can get by with an aluminum pan if that's all you can get. I've been using a seasoned aluminum pan (not a cake pan), but I just ordered some commercial-quality steel pans and a pan gripper last night: 6" steel deep dish pan, 9" steel deep dish pan, 12" steel deep dish pan, 14" steel deep dish pan, and a N9494 pan gripper.

Looks like Malnati's to me, except my pan is half an inch too deep.

Here's a formula for a good deep dish dough. This probably needs a little work, but it's still very good. (It's the formula I used for the dough in these pics.)

100% KAAP flour
48% Water
0.6% ADY
0.5% Salt
4% Pure olive oil
16% Corn oil

You may have noticed that I did not list cornmeal as an ingredient. That's because there is no cornmeal in real deep dish. Cornmeal in deep dish is probably the most widespread pizza myth there has ever been. The one thing everyone knows about deep dish is that it has cornmeal in it, but it's just not true. So don't put cornmeal in your deep dish dough unless you want to ruin it.

Here's a recipe that will make just about enough dough for two 12" pizzas, three 9" pizzas, or seven 6" pizzas (if my spreadsheet did the math right):

16.85 oz KAAP flour
8.09 oz Water
1.01 tsp ADY
0.49 tsp Salt
0.67 oz Pure olive oil
2.7 oz Corn oil

Here's how to make this dough:
  1. Measure 1 tsp of active dry yeast and put it in mixer bowl.
  2. Measure 8.09 oz of 110-degree water.
  3. Add about 2 oz of the water to the mixer bowl.
  4. Stir the water to dissolve the yeast.
  5. Measure 16.85 oz of KAAP flour.
  6. Measure 0.49 tsp of salt and add it to the flour. Stir to incorporate the salt into the flour.
  7. Measure 0.67 oz of pure olive oil.
  8. Measure 2.7 oz of corn oil.
  9. If the yeast water is foamy, add the rest of the water to the mixer bowl and continue to the next step. If the yeast water is not foamy, wait five minutes, then add the rest of the water to the mixer bowl and continue to the next step. (Even if the water is not foamy by now, go ahead and add the water, then continue to the next step.)
  10. Add the flour to the mixer bowl.
  11. Put the bowl in place on the mixer and attach the dough hook.
  12. Begin mixing on speed 2.
  13. Immediately after the dough starts mixing, add the olive oil and corn oil to the mixer bowl.
  14. Mix for about 1 minute. (As an alternative to using the mixer, you can mix this dough by hand, with a spoon, adding the ingredients to the bowl in the same order.)
  15. Remove dough from the mixer bowl.
  16. Divide the dough into appropriately weighed pieces of dough (see below) and place them in ziploc bags.
  17. Put the dough balls in the refrigerator and leave them there for 24 hours. (48 hours is fine, too, and I suppose 72 hours is no different. After that I'm not so sure.)

Before you begin baking, you should know how much dough to use for common pan sizes:

For each 6" pizza, use 3.82 oz of dough.
For each 9" pizza, use 8.16 oz of dough.
For each 12" pizza, use 14.14 oz of dough.
For each 14" pizza, use 19.02 oz of dough.

How to make the pizza:
  1. A couple hours before you intend to bake the pizza, remove the appropriate amount of dough balls from the refrigerator and let them warm up at room temperature.
  2. If you will be baking on a stone, begin preheating your oven at 500 about an hour before you intend to bake the pizza.
  3. Shortly before you intend to bake, remove your dough from its bag.
  4. Decrease the oven temperature to 450 degrees.
  5. Place your dough in a seasoned, unoiled deep dish pan of appropriate size. (Let's say you'll be making a 9" pizza. If so, you'll want to use about 8.16 oz of dough.) (How to season a pizza pan.)
  6. DO NOT ROLL THE DOUGH! Instead, press the dough into the pan with your fingertips until it completely covers the bottom of the pan.
  7. When the dough fills the bottom of the pan, crimp the outer edges of the dough against the sides of the pan. You'll want the lip of the dough to be very thin and reach about 1-1/4" up the side of the pan.
  8. If you're making a 9" pizza, cover the dough with about 7.2 oz of sliced mozzarella.


  9. Dough skin with appropriate amount of sliced cheese covering it.

  10. If you want to make it how most people order it in Chicago, cover the cheese with coin-sized pieces of raw Italian sausage, with a few millimeters in between each piece. (I'll put a picture here as soon as I get a chance. Right now I don't have a picture showing this.)
  11. Add other toppings (above the sausage if you used sausage).


  12. Pepperoni on half.

    Stanislaus Saporito Filetto di pomodoro tomato strips. This product works very well
    for deep dish. This and the next three pics show you a few angles of what
    kind of tomato product you want to use for this type of pizza.

    One way of showing you the texture of these tomatoes.

    Another way of showing you the texture of these tomatoes.

    Yet another look at the texture.

  13. Add about 9 oz of chunky tomato sauce (uncooked) above the toppings.


  14. I weighed the tomatoes before adding to the top of the unbaked pizza.

    Spread the tomatoes evenly around the pizza with your fingers.

  15. Sprinkle or dash some romano or parmesan cheese over the tomatoes. (You may want to sprinkle a little oregano, too.)


  16. Sprinkle some romano or parmesan cheese over the top just before baking

  17. Set the pan on the bottom rack of your 450-degree oven. If you bake on the stone, it should probably be on the bottom, too. (I was experimenting with the pizza I baked in the following picture. I don't normally advise using a setup like this, but this pizza turned out great.)


  18. Unusual oven setup, but it worked for me.

  19. Bake at 450 for at least 22 minutes. If you've done everything how I instructed, it shouldn't take longer than 25 minutes for the pizza to finish baking.
  20. If you don't know how the pizza should look when it's done, here are some visual clues that tell you the pizza is done: The crust will begin browning and pulling away from the side of the pan.

Bigger pizzas may take longer to bake than smaller pizzas. I'm not sure, though, because I've only ever made 10" pizzas.

For sauce just use a chunky tomato product, uncooked. If you can't get your hands on the Stanislaus tomato strips (or something like that), I suggest to buy whole tomatoes and chop them coarsely, then drain any excess liquid. A lot of serious home pizza-makers use diced tomatoes or Escalon 6 IN 1 tomatoes, but I don't really like either of those options. Diced tomatoes are too firm and 6 IN 1 is not chunky enough.

Here are some pics of fully baked deep dish pizzas:

Finished pizza, after baking at 450 for 22-25 minutes.

Removing the pizza from the pan. It might take a
little practice to do this without any trouble.

Baked pizza removed from the pan. Deep dish should be served in the pan, but I had to
remove it so I could take pictures of the outside of the crust.

Baked pizza on a screen with a couple slices gone.

Slice undercrust.

Even though I used finely chopped tomatoes on this one, instead of large chunks of tomato,
this one was the best deep dish pizza I've made, precisely because I processed the
tomato filets into smaller pieces than is typical on Malnati's style deep dish.

Lotsa cheese and wonderful gooeyness on this one. Mmmmm!

Here's a very good deep dish site, created by someone who is probably about as passionate about pizza as I am, but who focuses mostly on deep dish. Although I've made some damn good deep dish pizzas, realdeepdish.com is probably the best source of accurate deep dish information available. I will most certainly give Ed's dough formula a try before long. When I do, I'll share the results here.

Posted by Picasa