Tuesday, September 25, 2012

Deep dish pans and accessories

(Like this blog on Facebook!)

I'm about 95% certain American Metalcraft's 8000 series tin-plated steel pans are the best pans for Malnati's style deep dish, although I've never had a chance to use them. Here are the model numbers for those pans, with links to a vending source for each of the standard sizes of these pans:

T800615 (6" diameter, 1.5" deep)
T800715
T800815
T800915 (9" diameter, 1.5" deep)
T801015
T801215 (12" diameter, 1.5" deep)
T80132
T80142 (14" diameter, 2" deep)
T80162

I also like the American Metalcraft N9494 pan gripper, even though I don't have one. (I used a similar pan gripper when I worked at Pizza Hut years ago, and it worked really well to grab their pans, which have the same form/shape as these deep dish pans.)

It appears that KaTom is also a good source for all this stuff, and KaTom may have lower prices than eTundra (T800615, T800915, T801215, T80142, N9494 pan gripper). However, do not interpret this as an endorsement for either site, because I have never ordered from either of these places. (Having said that, I also want to add that they both appear legit to me, and I'll probably order this stuff from one of them soon. Update: In fact, I did order each of these things from Katom several hours after writing this post.)

I've been meaning to order some of these pans and the gripper for at least a year, but I still haven't done it. Consequently, when I make deep dish pizzas, I've been using aluminum pans (which are much more commonly available than the pans I've linked to). If you are unable to find a source for steel deep dish pans, aluminum pans are not a bad substitute. Just make sure not to get aluminum cake pans, which are made of a lighter gauge aluminum.

If you buy this kind of deep dish pan, you will need to season it on the bottom and the outside, as well as the inside on the sides. If you buy a deep dish pan that's already dark, you will not need to season it. How to season pizza pans.

Monday, September 24, 2012

How to season a pizza pan

(Like this blog on Facebook!)

Bottom of a cutter pan after seasoning in a grill.

As of June 10, 2013, this is the blog's most popular post, which makes it clear to me that a lot of people out there want to know how to season pizza pans. If you find this post helpful, or if you find it very unhelpful, please let me know in a comment so I can do my best to help people who end up here in the future. Thanks.

Before you decide to season any of your pans, you need to understand why you should season your pan(s). I thought for many years that the purpose of seasoning a pan was to give the top of the pan a natural nonstick surface. Well, I was wrong. And if that's what you think, you're wrong too.

The reason you season a pizza pan is to make it dark on the bottom so the pan will absorb heat rather than reflect heat. It has nothing to do with creating a nonstick surface. So naturally, when you season a pizza pan, you want to season the bottom of the pan, not the top (although you won't do any harm by seasoning the top as well).

Many types of pan are available either in their natural metal condition or alternatively with a dark coating or anodized coating. Anodized or otherwise dark pans don't need to be seasoned because those kinds of pans are manufactured specifically to simulate seasoning on a pan.

So what is seasoning? My definition here will probably not be the best definition, but to me seasoning is a build-up of burned cooking oil on the bottom of a pan, which makes the pan darker than its original color. You do this to pans so they will attract heat rather than reflect heat.

Why season a pan? Because it's counterproductive to bake pizza in a pan that reflects heat instead of absorbing heat. Using a non-seasoned pan for pizza just wastes energy, leads to a considerably longer bake time, and usually ends up creating an inferior product.

So how do you season a pan? I'll get to that in just a minute.

Here are a couple pictures of a brand new unseasoned aluminum cutter pan. This kind of pan is used primarily for making pizzas similar to Pizza Hut thin & crispy, but it can also be used to make other types of pizza. For example, Pizza Hut also uses this kind of pan for their "hand-tossed traditional" style pizza (which is neither hand-tossed nor traditional).

The top of a brand new aluminum cutter pan, unseasoned.

The bottom of a brand new aluminum cutter pan, unseasoned.

How to season a pizza pan:

When you begin to season your pan, the first thing you should do is clean and dry the pan. After that, if you have a gas grill, go outside and start the grill, setting all the burners to high so it'll heat up quickly.

If you don't have a gas grill, you'll need to use your oven to season the pan. So preheat the oven to 400 degrees, or maybe even 450 or 500. (Honestly I don't know what works best in an oven because the first time I tried to do it this way I smoked up the house, and that was one too many times trying to do it that way.) Warning: If you season the pan in your oven, it will smoke up your house, and it will also take longer to season the pan. That's why I suggest using your grill.

The reason your oven or grill should be about 400 degrees is because 400 degrees is just a little hotter than the smoke point of most cooking oils, but not hot enough to vaporize the oil. Basically what you're doing here is turning the oil from sort of a liquid to a solid. Or maybe a better way of putting it is that you're burning the oil onto the pan. If you season your pan in an oven or grill that's too hot, you'll accomplish two things: First you'll season the pan, but then you'll also vaporize the new layer of seasoning, and you'll end up with a pan that looks just like new. (Now you know how to unseason a pan.)

Here are the steps you should take when seasoning your pan. (I've already given the first couple steps but I'll repeat them in an effort to make the list of steps complete):
  1. Wash and dry the pan.
  2. Preheat your grill or oven to a little over 400 degrees. Once the grill reaches 400, set all the burners to their lowest position.
  3. Drip a very small amount of cooking oil on the bottom of the pan, as pictured below. (I use canola oil, just because there's always canola oil available where I live.) You don't need much oil. In fact, you should use such a small amount of oil that you can barely coat the entire pan surface with oil.


  4. A small drop of canola oil on the bottom of the pan to begin the seasoning process.
    It's important not to put any more oil than this on your pan.

  5. Use your fingers to rub the oil into a very thin layer that covers the entire bottom of the pan, as well as the sides of the pan.
  6. Place your pan inside the grill with the oily side down and close the lid. (Or, if you're using your oven, place the pan in the oven with the oily side down and close the oven. You might want to open the kitchen windows, too, because there will be nasty smoke from the burning oil. You should probably do this when no one else is home.)
  7. Set a timer for at least 20 minutes but not more than 30 minutes. If you don't, there's a good chance you'll forget about the pan and end up leaving the grill burning for a couple hours. (I've forgotten about a pan in the grill more than once.)
  8. After your timer goes off, check the pan. If the bottom of the pan is dark and doesn't look wet, go ahead and turn off the heat. (I leave the pan in the grill until the grill cools down, but I don't suppose that really does anything, so go ahead and remove the pan if you want.) Here's a pic of my pan after seasoning for half an hour on the grill.


  9. Bottom of seasoned pan. A very small drop of oil did this, which demonstrates that
    it's important to put a ridiculously small amount of oil on the pan you'll be seasoning.

  10. If you want the pan to be darker (which is probably a good idea), repeat steps 2 through 7. Here's a pic of my pan after a second seasoning.


  11. Bottom of pan after second round of seasoning in the grill.
So there you go. Now you know how to season a pizza pan.

One more thing: Don't ever wash the pan after you've seasoned it (unless the cat took a shit on the top of it or something). If you wash a seasoned pan, you will remove little pieces of seasoning. So instead of washing the pan after normal usage, just wipe the top side after you use it. Or not, because you really don't need to do that.

Posted by Picasa

Friday, September 21, 2012

Ryan's New York style (baked in a grill)

I'm still drafting this post. I have plenty to add, and a ton of revising to do, so check out what I've already drafted and come back later to see what I've added.

Pizza after a 5-minute bake on the grill. This is not my favorite pic, but other
people seem to think it looks good.
 
Beautiful color on this one. Nice texture, too, which wouldn't
have been there if I had used this dough a day earlier.

If you want to make NY style pizza the same day you make the dough, this post will not guide you there. I will eventually write another post for same-day NY style dough, but I want you to know right now that same-day NY style dough isn't nearly as good as a 48-hour or 72-hour dough.

This post is about NY style pizza baked in a grill (on a stone) 2 or 3 days after you mix the dough. This pizza can also be done in a home oven, but I usually make them on the grill because real NY style pizza is supposed to be baked in a deck oven at about 650 degrees, and the grill gives me similar conditions as a 650-degree oven. (Plus my oven sucks in just about every way possible.)

Unfortunately, there are some drawbacks when baking in a grill instead of an oven. First of all, the heat distribution is very uneven between the top and the bottom; there is a ton of bottom heat, but not enough top heat. Consequently, the bottom of the pizza almost always finishes well before the top of the pizza. If you allow the top to finish completely, you'll end up with a very overbaked (or burned) crust. Also, you lose a whole bunch of top heat every time you open the grill, and it takes a while for the grill to recover that heat. That means it's best not to open the grill while the pizza is baking, which is kind of impossible if you need to rotate, adjust, or check the pizza. Fortunately I've learned some tricks that help me get around this, and I'll share these tricks with you later in the post.

The grill does not forgive. If you're not an extremely experienced pizzamaker, it's really easy to mangle pizza on the grill. But even if you are an experienced pizzamaker, it's still easy to mangle pizza on the grill. This is evident in some of the pictures I've included in this post, as some of my pictured pizzas have very dark (burned) spots on the bottom of the crust and/or the outer edges.

I'm telling you this stuff because I don't want to mislead you into thinking you're gonna crank out a bunch of beautiful pies as soon as you start baking on the grill, because you probably won't. Still, I don't want you to be afraid to make pizza on the grill, because with a little practice you can make some of the most amazing pizzas you could ever imagine.

The great thing about screwing up is that mistakes always present wonderful learning opportunities. Before you will be able to make beautiful, delicious pizzas, you'll make dozens of pizzas that you won't really want people to see or eat. Don't worry about it, though, because even bad pizza is usually pretty good.

Here's the formula for this dough:

100% All Trumps bleached & bromated high gluten flour (General Mills)
58% Water
0.63% ADY
1.5% Salt
1.58% Oil

You can substitute all-purpose flour, bread flour, or any other high gluten flour to make this dough, but doing so will likely sacrifice almost everything that is great about this pizza. Needless to say, I highly recommend using All Trumps bleached and bromated flour if you're not afraid to buy a 50-pound bag from your local foodservice distributor (for less than $25). If you can't get All Trumps, at least try to find a bromated flour. (Actually, I think pennmac.com ships 5-pound bags of All Trumps flour, in addition to many other pizzamaking ingredients and tools.)

To make enough dough for two 14" pizzas, here's a recipe based on the formula above:

15.46 oz HG flour
8.97 oz Water
0.93 tsp ADY
1.35 tsp Salt
1.54 tsp Oil

Even though you normally want to keep your measurements as precise as possible, it's OK if you round these measurements to 15.5 oz, 9 oz, 1 tsp, 1.5 tsp, and 1.5 tsp. This recipe will make 25 oz of dough, which you will divide into two dough balls of about 12.3 oz. If 25 oz of dough is not the right amount of dough for you, use the formula above to come up with a batch size that's most appropriate for your needs.

Specialized tools you will need to make this pizza:
  • A wooden pizza peel.
  • A baking stone (cordierite) at least 1/2" thick. If you have a thin stone that came from a cook store or department store, it will probably break. Plus it's not very useful because it doesn't have much thermal mass.

To make this batch of dough, follow these instructions:
  1. Measure 8.97 oz of 110-degree water, and pour about 2 oz of the water into your mixer bowl.
  2. Measure 0.93 tsp ADY and add to the water in mixer bowl.
  3. Stir the yeast water if you feel so inclined.
  4. Measure 15.46 oz of flour.
  5. Measure 1.35 tsp of salt and add to flour. Stir the flour to incorporate salt.
  6. Check the yeast water. If it is foamy, add the rest of the water to the mixer bowl and move on to the next step. If it is not foamy, wait about five minutes. It should be foamy by then. If so, add the rest of the water and move on to the next step. If not, consider buying new yeast, but move on to the next step anyway because everything will probably work out.
  7. Add the flour and salt to the mixer bowl.
  8. Place the mixer bowl on the mixer and start mixing on speed 2 with the dough hook.
  9. After the dough comes together into a shaggy mass (less than a minute), add 1.54 tsp of oil to the dough (without turning off the mixer).
  10. Mix until the dough has a texture similar to cottage cheese. (With my mixer, this takes about 3 minutes.)


  11. Dough after mixing for 3 minutes. Notice that it is not smooth like most cookbooks say
    it should be. 3 minutes is an appropriate mix time for a dough that will be used at least
    two days after mixing.

  12. After mixing, let the dough rest for about half an hour. This is not a rise; it's just a rest.


  13. Same dough after resting for half an hour.

  14. Divide the dough into two pieces of about 12.3 oz each.


  15. Dividing the dough into two pieces of equal weight (about 12.3 oz).

  16. Give each piece of dough a few kneads and round into tight dough balls. (I know this instruction doesn't help you much, so I'll try to find a better way to explain this procedure.) Place each dough ball on the counter, seam-side down.


  17. Two dough balls, rounded and ready to refrigerate. Notice how smooth this
    dough looks compared to the dough in previous pics. It's the same dough.

  18. Put the dough balls in some kind of air-tight setup, like plastic wrap, a bag, or a bowl. There are many different ways you can store your dough balls. I use plastic wrap to make sort of a book-like setup, as demonstrated in the next two pictures. Another way you could store the dough is in a very-lightly-oiled plastic bowl, covered.


  19. This pic shows the first step of my wrapping method. At this point I spray a light mist of
    nonstick spray on the top of the dough ball to make it easier to remove the plastic wrap later.

    Dough ball with the plastic wrap folded over it, before refrigeration.

  20. Once you've figured out how you prefer to store your dough, immediately put the dough in the refrigerator and leave it there for at least two days.


How to bake the pizza:
  1. Remove dough ball(s) from fridge two hours before you intend to make pizza, and allow the dough to warm up at room temperature. (The dough will not warm up all the way to room temperature.) Since it's easier to remove cold dough from bowls or plastic surfaces, remove the dough and place it on a pan, as pictured below. Then cover with a bowl.


  2. Dough ball after being removed from the refrigerator.

    Dough ball on the pan, with a bowl covering it to keep it from drying out.

    Dough ball after rising & warming at room temperature for about an hour and a half.

  3. Make sure there is a baking stone in your oven or grill.
  4. Important: If you'll be baking in the grill, line the bottom of your stone with aluminum foil. This will reflect some of the intense heat from the burner instead of allowing the stone to absorb all the heat. If you don't do this, your crust will be black within a couple minutes of baking, but the top of the pizza will not be anywhere near finished. (I can't say for sure whether it's better to keep the shiny side or the dull side of the foil exposed because I've never paid attention or thought about it.)
  5. If you'll be baking in your oven, make sure there's a stone inside it, then preheat the oven at its max temperature beginning an hour before you intend to bake the pizza. If baking on the grill, insert your stone, then set the burners to high and pre-heat the grill and stone for about 45 minutes before you begin baking.
  6. Before you begin assembling the pizza, remove your dough ball from its proofing pan, and coat the dough ball with flour.
  7. Set the dough ball on your work surface (counter) and use your fingertips to flatten the dough.
  8. There are many different ways to stretch NY style pizza dough. Since it's difficult to explain how to do this with text, I suggest that you watch a dough-stretching video on YouTube to learn. [Insert dough stretching pic (from bottom of this page) here.]
  9. Once you've stretched the dough to the desired size, set the dough on your counter and add a large pinch of flour to the top surface of your wooden peel. Use your palm and fingers to distribute the flour evenly across the entire surface of the peel.
  10. Place the dough skin on the floured peel.


  11. Dough skin on a wooden peel, ready to be topped and baked. Notice
    that there is not an abundance of flour on the peel.

  12. Top the skin with sauce, cheese, and toppings.


  13. Dough skin with a relatively light application of sauce.

    Dough skin with sauce and cheese.

  14. Give the peel a quick shake to make sure the dough is not sticking to it.
  15. Peel the dough onto the stone in your grill or oven.


  16. Me peeling a 16" pizza onto a 15.5" stone. Don't try this until you've
    made a few thousand pizzas.

    The pizza just after peeling it onto the stone.

  17. If you're baking on the grill, and if you landed the pizza completely on the stone (without any dough hanging over the side), set a timer for 5 minutes.


  18. The same pizza baking on the stone after a few minutes. Take note
    of the foil lining the bottom of the stone.

  19. When the timer hits 4 minutes and 30 seconds, open the grill and use a peel to lift part of the pizza so you can see the bottom. If your grill puts out the same temperatures as mine, the pizza should be just about done. A nice brown color is what I call done. It's your pizza, though, so it's your call.
  20. If you baked in the oven at 500, it should take about 7 minutes for your pizza to finish baking.
  21. When your pizza is done, remove it, cut it, and serve it.

    The same pizza just after baking. Notice that it wouldn't hurt for
    the top to be a little more done.

    Underside of the same pizza. One of my favorite pics.

    This is beautiful to me. That's the color I want my pizza crusts to be.

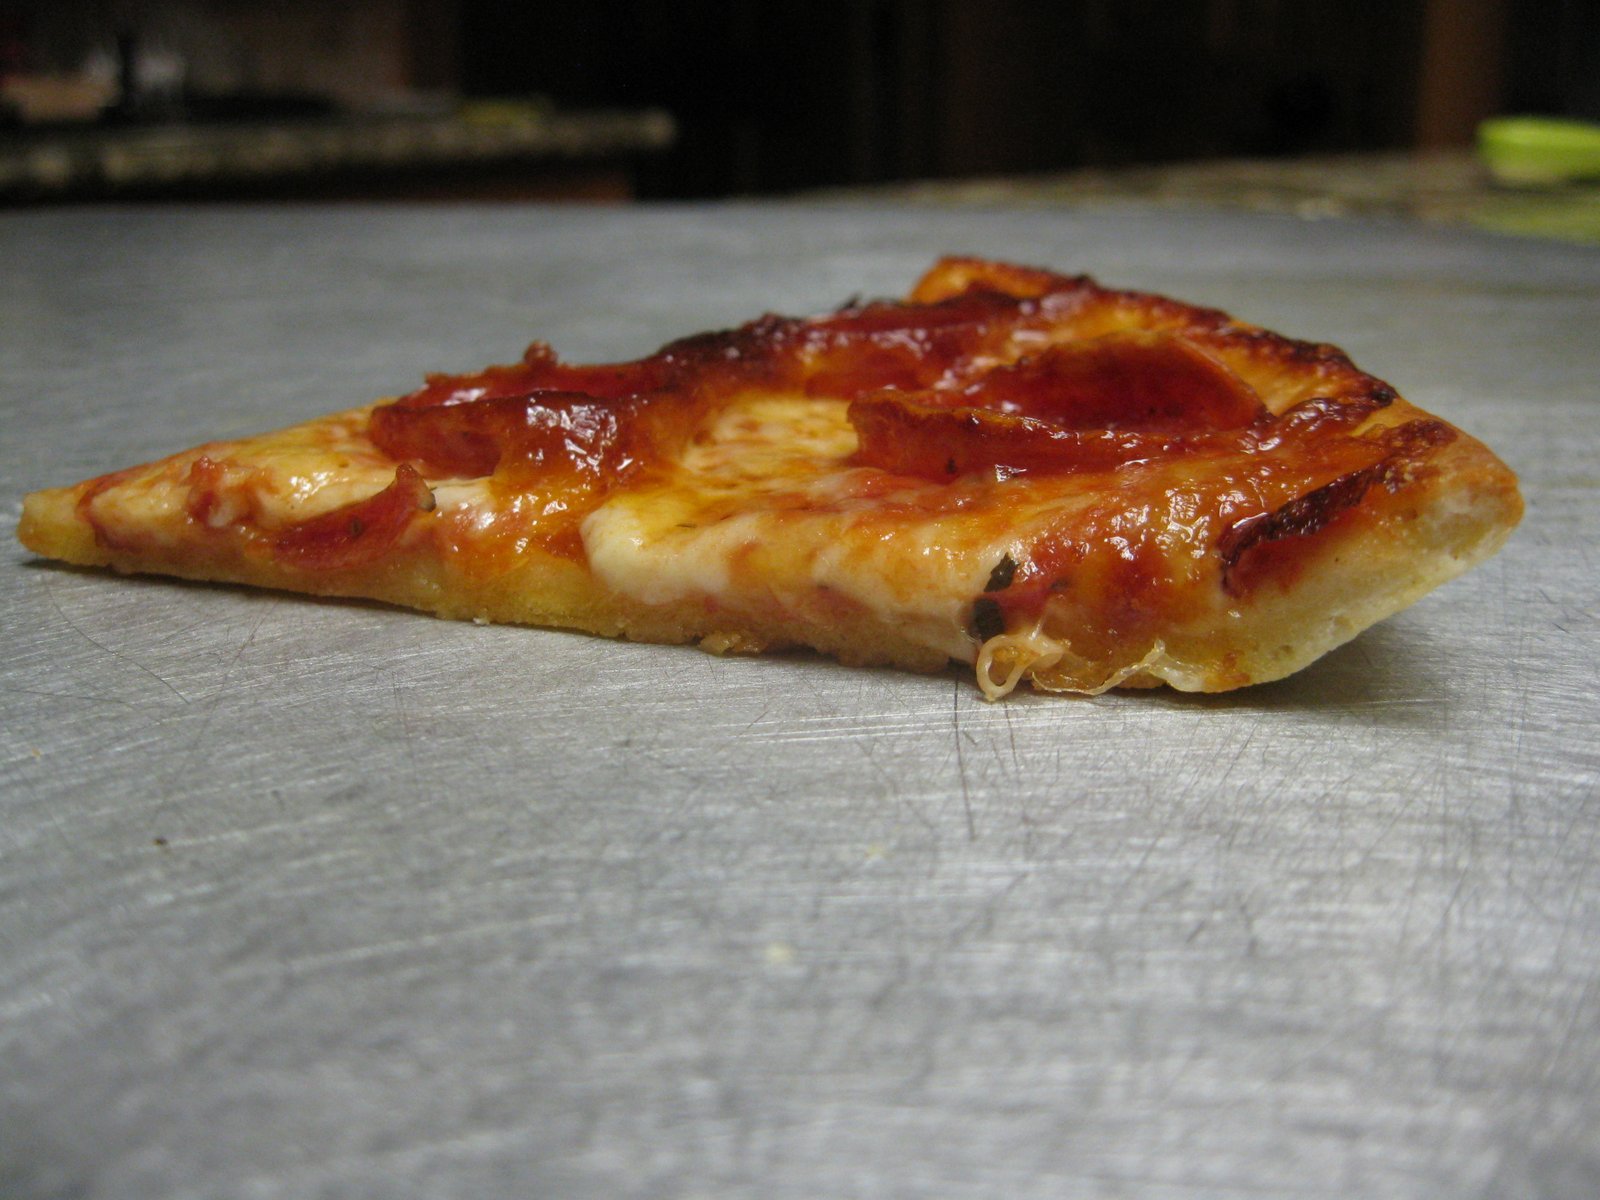
    Profile of a slice to show its thickness (or, rather, its thinness).
Tips: I like to expose dough balls to air for about an hour before I knock them down and stretch them. By doing this, the top of the dough ball dries a little, causing a light crust to form on the dough ball. The top of the dough ball becomes the bottom of the skin, and the dry bottom of the skin makes it much easier to slide the skin off the peel. The dried dough also creates a nice texture on the bottom of the pizza.

Things you need to know about NY style pizza:
  1. Despite the fact that most "experts" almost always say to let dough rise (or bulk-ferment), then punch down the dough before you divide the dough and form dough balls, New York style dough is not supposed to be allowed to bulk ferment. We're not making bread here; we're making pizza. Instead of allowing the dough to bulk ferment after mixing, the dough should be divided, scaled, and rounded into dough balls immediately after mixing. Allowing the dough to bulk ferment makes a huge difference in the texture (or crumb) of the crust. Bulk fermenting creates a more intricate crumb structure, which many people prefer, but New York style pizza does not have an intricate crumb structure.
  2. Celebrity chefs don't know what they're talking about when it comes to any style of pizza. Don't listen to them. Baking and cooking are two different things, and celebrity chefs are cooks, not bakers. I'd say the same thing about cookbook authors, with one difference: Although some cookbook authors probably do know about pizza, they're usually forced by their publishers to dumb it down, and their books are useless.
  3. Don't even think about using the dough the same day you make it. (The best NY style dough is refrigerated for 2 or 3 days.
  4. When you make dough that will be refrigerated for more than a day, you should undermix the dough. The gluten will develop while the dough ferments. So if you mix the dough to full gluten development, you'll end up with a tough, overdeveloped gluten structure. I mix my dough for 3 minutes. I used to mix it for 15 minutes, like most cookbooks and other resources instruct. But over a span of many years and a few thousand pizzas, I learned not to do that.
  5. Never use a pan or a screen to make NY style pizza. Actually, you can use a pan or a screen if you want. Just realize that if you bake your pizza any way other than by peeling the pizza directly onto a stone, the pizza is not NY style. Instead, it will be a lame copy of NY style.
  6. If you use a rolling pin, it's not NY style.
  7. Window-paning is useless. I know Alton Brown seems like he knows what he's talking about, but when it comes to pizza or baking, he doesn't. He's a chef, not a baker or pizzamaker. If you can window-pane this dough, you have overmixed it.


Still trying to figure out whether to keep any of the following pics in this post.

Nice color, but a little dark in the spot on the left. That's one of the things you have to
deal with when you bake on the grill.

Undercrust shot, or "upskirt."

Topped and ready to be peeled onto the stone.

Ready to be removed from the grill.

Just after baking.

Another baked pizza.
Posted by Picasa

Thursday, September 20, 2012

Pizza Hut Thin & Crispy clone

(Like this blog on Facebook!)

Even though this is the first style of pizza I'm sharing on this blog, I've only made about five of these pizzas so far. Needless to say, that's not much experience. Regardless, I've already created a near-clone. As I continue trying to make a better clone, I'll add formulaic and procedural updates at the bottom of this page.

This pizza wasn't quite a perfect clone; I'd say I got it about 90% right. However, I'm confident that if I had delivered it to someone in a Pizza Hut box, they wouldn't have known the difference. If you follow my instructions carefully, you will be able to make a Pizza Hut thin & crispy clone as well. Find out how to do it yourself.


A slice of my Pizza Hut Thin clone.


Profile of Pizza Hut Thin clone.


Overhead view of Pizza Hut thin clone.

Specialized equipment you'll need for this pizza (all of which will be pictured later in this post):
  • A cutter pan, seasoned on the bottom. I'm using a 10" pan, which I bought at a restaurant equipment supply store. Here's how to season your cutter pan.
  • Dough docker. You can get a cheap one of these for about $10, or a good one for about $20, at any restaurant equipment supply store, or possibly at a cook store. (I use a cheap one.) I buy all my equipment at restaurant equipment supply stores, and you should, too, because cook stores sell crap.
  • Pastry roller. I don't think I've ever seen one of these at a restaurant supply store, so you might have to get this from a cook store.

Here's the formula I used for today's dough, which I based on 1 pound of King Arthur all purpose flour:

100% KAAP flour
37.5% Water
1.25% ADY
1.61% Salt
3.13% Canola oil
0.38% Sugar

Since this blog is new, and because there might be people reading this who have no idea what all that stuff means, here's the ingredient measurements I used. (Flour and water are measured by weight, not volume.)

16 oz King Arthur all purpose flour
6 oz Water
2 tsp Active dry yeast
1.5 tsp Salt
1 Tbsp Canola oil
1/2 tsp Sugar

The picture on the right shows how the dough should look immediately after mixing for 10 minutes in a KitchenAid Professional 5 mixer with a spiral dough hook.

As you should be able to tell by looking at the picture, this is a very stiff dough. It's probably the stiffest dough I've ever made, and it's probably the stiffest dough I ever will make. Normally I don't mix for anywhere near 10 minutes, but with this batch the dough hook had a difficult time reaching this dough because the dough was in so many small pieces, instead of one piece. With any dough as stiff as this one, be sure to stay near your mixer during the mixing period because this dough could damage your mixer if you're not careful.

If you don't want to risk ruining your mixer (or if you don't have one), this kind of dough can also be mixed in a food processor. In fact, I think the food processor works better than a mixer for this kind of dough, even though Pizza Hut does not mix their dough in food processors. I will write another post about making this kind of dough in a food processor. (Hopefully soon.)

Procedures for mixing the batch size I made:
  1. Measure 2 tsp of ACTIVE DRY YEAST and place in mixer bowl. (If you use a different kind of yeast, 2 tsp will not be the right measurement. For example, if you use instant yeast, you will want to use 1/2 or 1/3 as much as the amount of active dry yeast used in any dough formula.)
  2. Measure 6 oz of warm water (110 degrees) and pour about half of it into the bowl of yeast.
  3. Stir the yeast water if you feel so inclined.
  4. Add 1/2 tsp of sugar to the yeast water.
  5. Measure 16 oz of King Arthur all purpose flour and set it aside.
  6. Measure 1.5 tsp of salt and add to the flour. Stir the flour a little to incorporate the salt evenly within the flour.
  7. When the yeast is clearly dissolved in the water, after about 10 minutes, add the rest of the water to the yeast water. (The yeast water should be foamy before you add the rest of the water, but it may be ready even if the yeast water does not become foamy, depending on various factors.)
  8. Add 1 Tbsp of oil to the water.
  9. Add the flour to the wet ingredients.
  10. Incorporate all the ingredients by hand for 10 or 20 seconds, using the dough hook or a spoon.
  11. Using your mixer, with the dough hook attached, mix the dough for 5 minutes, or until it looks like a shaggy mess. Even though the dough will not seem very well mixed, this will be long enough because the dough will come together better as it ferments.
  12. Cover the bowl with plastic wrap and let the dough rest for about half an hour in a warm environment.
  13. After half an hour, cut off a piece of dough about twice as heavy as you will need for your pizza. (For example, I'll be making a 10" pizza, which will require about 6.5 oz of dough, so I used a 13 oz piece of dough.)
  14. Dough shortly after mixing.
  15. Put the dough back in your mixer bowl and cover with plastic wrap.
  16. Put the rest of the dough in a ziploc bag and into the refrigerator. You can use this dough the next day or up to several days later.
  17. Let the dough ferment for at least five hours at room temperature. (You might even be able to let this dough ferment at room temperature for 24 hours or longer. I can't say for sure right now, though, because I haven't tried it yet.) 
    Dough five hours after mixing. By comparing this pic to the previous pic,
    you should be able to see that the dough will rise, but it won't rise a lot.
When you're ready to make a pizza, set your oven to bake at 500. I keep a baking stone in the oven, which I pre-heat well in advance of baking the pizza, but that may not be necessary for this kind of pizza, since the pizza will bake entirely in a pan, rather than directly on the stone.

Now comes the hard part: rolling the dough.

  1. Remove the dough from mixer bowl and place on your work surface (counter).
  2. Flatten the dough as much as you can using your hands.
  3. Without adding flour, roll the dough with a rolling pin.
  4. Roll the dough until it is larger than your cutter pan. Basically you want to roll it almost as thin as you can. (This will take a lot of work, and you'll probably never do it again.)
  5. Top of the cutter pan, just before trimming the dough.
    The bottom (seasoned side) of a 10" cutter pan.
  6. When the dough is as thin as you think it should be, spray your pan lightly with nonstick spray and drape the dough over the pan so it covers the entire pan.
  7. Use your fingers to press the dough into the "corners" of the cutter pan so the dough hugs the surface of the pan.
  8. Dock the dough. (Alternatively, you could dock the dough before Step 5.)
  9. Use the pastry roller to cut the excess dough on the lip of the pan. (Add the scrap dough to the bag with the rest of the dough from earlier, then put it back in the refrigerator.)
  10. The dough after being docked and trimmed. Also, a pastry roller (left) and
    dough docker (right).
    This is a little misleading because the pan weighs about 10 oz.
    Consequently, the scale is showing that the dough skin
    weighs a little over 7.5 oz, not 17.5 oz.
  11. If you've made a 10" pizza, top the dough skin with 3 oz of sauce and 4 oz of cheese. Add toppings however you want.
  12. 10" dough skin with 3 oz of sauce.
    5 oz of cheese. (That may be a little too much.)
    Pepperoni.
  13. Bake at 500 for at least 10 minutes. If you roll the dough extremely thin, the pizza will be done after 10 minutes, but thicker dough will take longer. Unless you make an excessively thick dough skin, this pizza should be finished by 12 or 13 minutes. (All ovens are a little different, so your results may be slightly different.)
  14. This pic shows that I baked on the stone on the bottom rack of the oven.

Remove the pan from the oven, and transfer the pizza from the pan to a cutting surface. If you've made a 10" pizza, cut it into 6 pieces. (Cut a 12" pizza into 8 pieces. Cut a 14" pizza into 12 pieces.)

Eat

The sauce I'm currently using for this kind of pizza consists of:
  • 28 oz crushed tomatoes
  • 2 tsp dried oregano
  • 1/2 tsp dried basil
  • 1/2 tsp salt
Don't cook the sauce. Cooking pizza sauce is the easiest way to ruin it. Just mix the ingredients and keep refrigerated.


One slice turned over to show you the extent of browning.
I like bite-mark pics because I think they make the best profile pics.
Get used to seeing this kind of pic.
This pic shows the rigidity of the slice.


Update (9/22/12): I made a much different dough for this style last night, using a lot of oil and a very low hydration, mainly as an experiment. After about 12 hours of room temperature bulk fermentation, it's clear that the hydration for this formula is too low to work. Here's the formula:

100% KAAP
29% Water
2% ADY
2% Salt
10% Oil
0.6% Sugar

Even though this dough feels nothing like real Pizza Hut dough, and even though I want to just toss it, I'm still gonna try to make a pizza out of it. However, I'm also going to make another batch of dough, with 32% hydration, to make at about the same time. (Note: I made this dough at about 9:00, and I intend to use it mid/late-afternoon.)


Update (9/22/12, 2:00 pm): Well, forget that idea. While my dough was in the oven on bread proof mode, about an hour ago, somehow the oven got turned on and melted the bowls of dough. It probably happened because someone bumped the horribly-designed, dangerous KitchenAid oven control panel, accidentally and unknowingly turning on the oven. I subsequently made another batch of dough.


Update (9/25/12): Below is the formula I used for the dough I made last night, which I bulk fermented overnight and used today.

100% KAAP
38% Water
2% ADY
1.5% Salt
3% Oil
1% Sugar

This one was really close; definitely better than the dough from the beginning of this post, which was pretty good itself.

My previous batch of dough used 5% oil, and that was obviously too much, as the crust was biscuity. After decreasing the oil from 5% to 3%, it became clear that the unwanted biscuity texture had resulted from the higher oil content. But there was still a hint of biscuity texture with today's pizza, which tells me there should not be any more than 3% oil in this dough, and in fact that 3% is probably too much oil. So my next batch will contain 2% oil.

I increased the sugar by a considerable amount from the previous batch, but I think it still needs to be a little higher because the crust isn't browning quite as much as it should.

Also, 2% ADY is not enough. I let this dough bulk ferment at room temperature for 18 hours, and it still seemed a little underfermented. Keep in mind that Pizza Hut starts using their dough only a few hours after they mix it (if they still make the dough on site). That means I probably need to increase the yeast at least another percent. I'll go with 2.5% ADY with the next batch (which I won't make until tomorrow).

The stiffness of this dough felt just about right. Because I'll be dropping the oil percentage by 1% with the next batch, I'll also increase the hydration by 1%.

The formula for the next batch will be:

100% KAAP
40% Water
3% ADY
1.5% Salt
2% Oil
1.5% Sugar

Also, I've been mixing the dough longer than I mixed the dough at the beginning of this post, and I'd say that's the right thing to do.


Update (9/27/12): That didn't work. I made a pizza today after a 19-hour room-temperature bulk ferment. Even though the dough was very stiff when I mixed it, the crust ended up soft and sorta bready. I attribute this to the very high yeast percentage. Also, the crust had a blonde hue that just doesn't look like PH to me. I think this is from the oil, and I think other unwanted characteristics are from oil, too. So I'm not going to put any oil in the next batch. And I'm still not seeing the kind of browning I want, so I will increase the sugar a little in the next batch.

Next batch of dough will be:

100% KAAP
40% Water
2% ADY
2% Salt
2% Sugar


Update (9/28/12): I learned something today.

The reason yesterday's pizza was soft, pale, and icky is because it was overfermented after a 19-hour room-temperature bulk ferment. Today's pizza was not like that, even though it was made from the same dough. The difference is that the dough I used today had been refrigerated until this morning, at which point it began an 8-hour room-temperature bulk ferment. With the same thickness and bake time, today's pizza ended up very crispy (almost crunchy) with plenty of browning.

As a result of today's lesson, I'm gonna keep the yeast at 3% for the next batch (but the room-temperature bulk ferment will be much shorter), and I'll keep the sugar at 1.5%. There will be no oil in the dough, and I'll probably change the hydration to 41%, rather than 40%.
2% Sugar


Update (9/30/12): Made from dough that I mixed yesterday, today's pizza was almost a perfect clone of Pizza Hut thin. Here's the dough formula:

Nearly Perfect Pizza Hut Thin Formula
100% KAAP flour
41% Water
3% ADY
2% Salt
1.5% Sugar

Mixed for about 12 minutes (until there was no loose flour in the mixer bowl), then into the fridge for about 36 hours. Removed from the fridge 6-8 hours before I intended to make the pizza. Rolled the dough, topped, and baked for 11 minutes at 500 on a preheated stone. (11 minutes was a little too long of a bake time. Next time I'll only bake for 10 minutes.) If you don't want to refrigerate this dough, I think this dough would work fine after a 4-hour room-temperature bulk ferment.

I don't plan on making this style of pizza for a while. But whenever I do it again, I will use this formula, rather than the formula at the beginning of this post. Also, I will make the dough in the morning and allow it to bulk ferment at room temperature for around 4 hours. Whenever I get around to doing this again, I will take a whole bunch of pictures, then write a new post, documenting every step.

Note: Instant yeast is probably more appropriate for this dough than active dry yeast. If I had instant yeast, I would try 1% to 1.5%.

Posted by Picasa